Drawing #2: Schenley Park
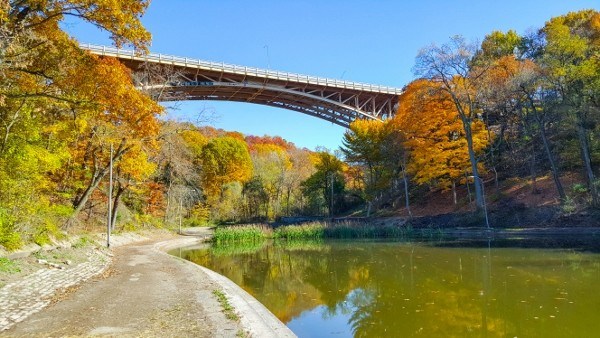
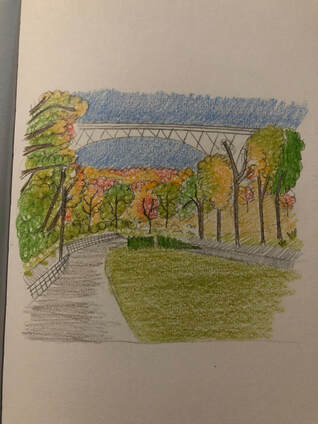
For a something more nature-like, I reccomend drawing some scenery like this beautiful photo taken in Schenley park. For these drawings, I will be omitting the poles which are seen along the pathway, since I think it takes away the focus from the trees.
For this drawing, you will need a graphite pencil, an eraser, and a sharpener if your pencil is not mechanical.
Estimated drawing time: 20 - 40 minutes
For this drawing, you will need a graphite pencil, an eraser, and a sharpener if your pencil is not mechanical.
Estimated drawing time: 20 - 40 minutes
|
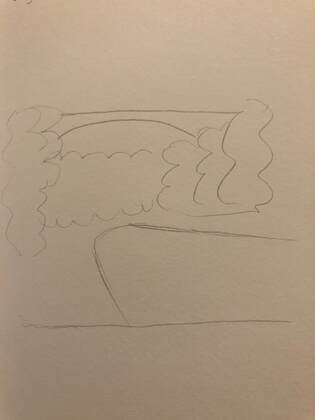
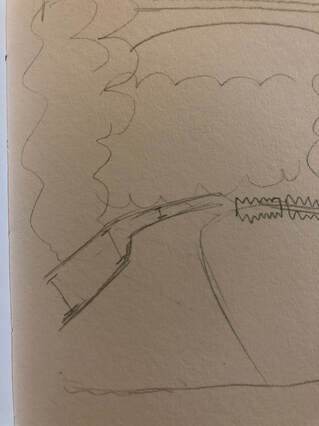
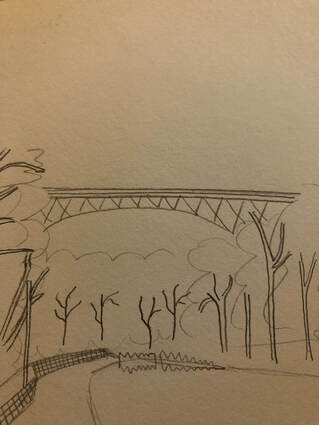
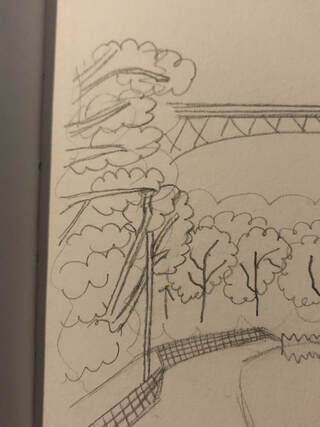
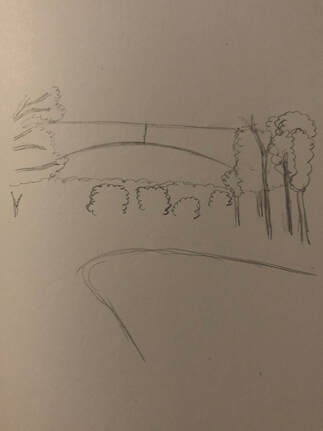
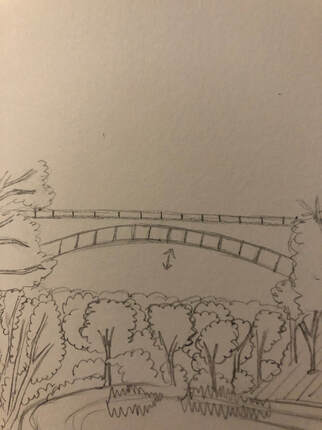
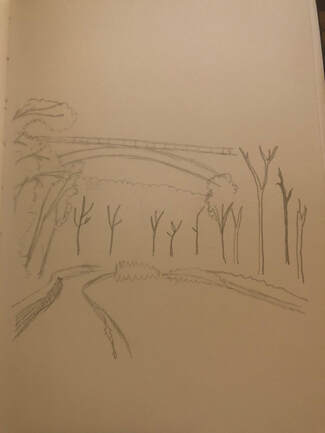
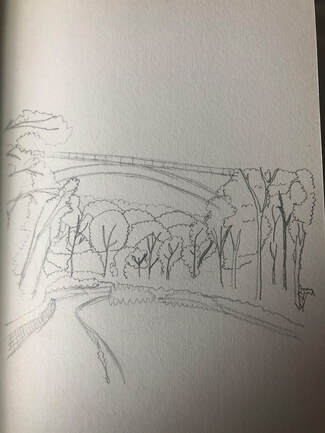
To begin, we will draw a very rough draft of the photo. Make sure you get the placement of the lake, trees, and bridge as accurate as possible.
|
|
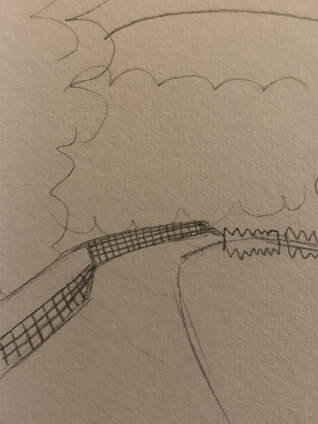
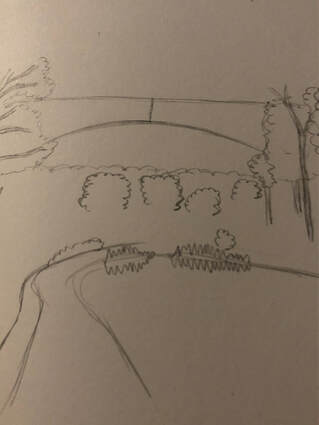
Next, we will work on the dirt pathway. I drew sideways lines on the pathway to help with perspective; the lines closer to the bridge are smaller since this part of the pathway is further away from the viewer, and the lines closer to the viewer and bigger/ longer.
|

|
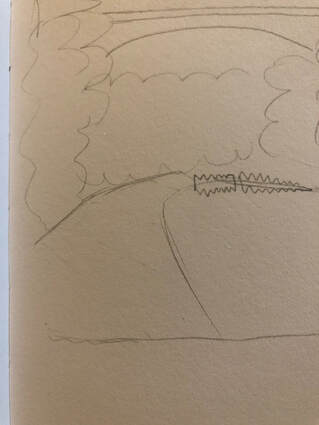
Towards the end of the pathway, draw some zig-zags. This looks like long grass, but since its quite far away, it doesn't have to be detailed. I also added a small layer on top of the bridge.
|
|
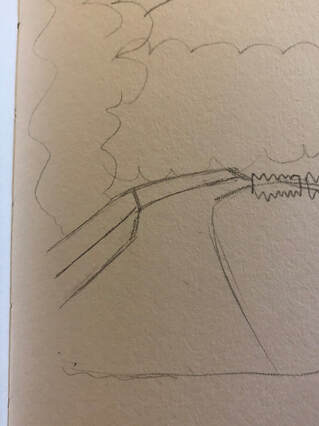
Focusing back on the pathway, erase the lines.
|
|
Next, we will add a cut hill around the pathway. Make sure the back part of this cut hill is smaller than the front part. I added the "I's" around the cut hill to help you understand perspective.
|
|
Next, erase the "I's" (if you drew them on), and in the front part of the hill, draw a horizontal line, cutting the hill in half. Draw a vertical line that seperates the front part of the hill from the back part of the hill.
|
|
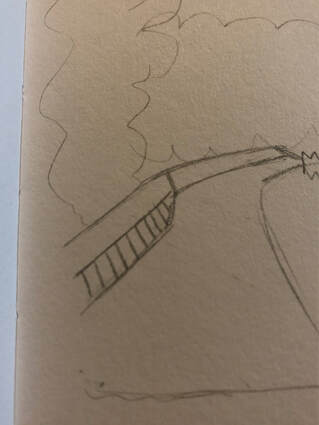
On the bottom front part of the hill, add vertical lines as so, decreasing spacing between each line the further back you go
|
|
Then, add horizontal lines. Have these horizontal lines come closer together the further back you draw them.
|
|
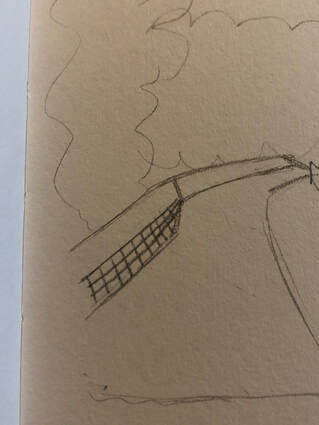
Repeat the past two steps for the back half of the hill.
|
|
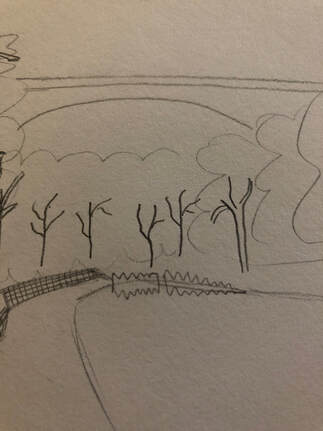
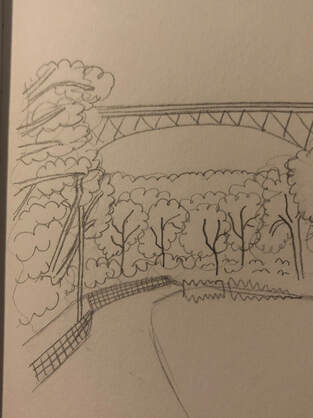
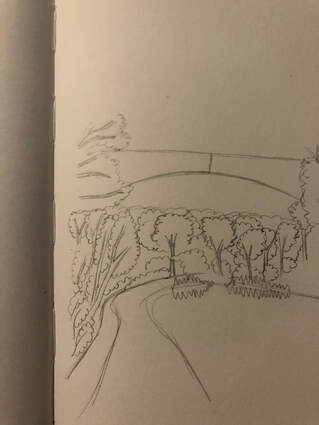
Now, to move onto the trees. Start off by drawing the branches. These branches don't have to be exact copies of what is seen in the original photo, but should at least have a similar resemblance.
|
|
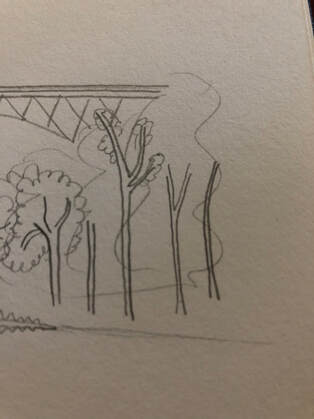
For the trees further away, simply create sticks as seen in the photo in the left.
|
|
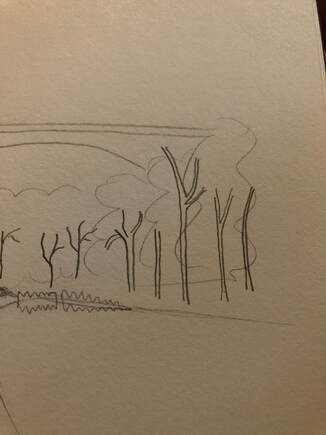
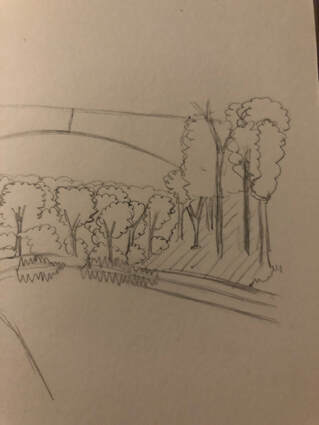
For the trees on the right, they aren't far away to be drawn as sticks like the trees we just drew. Draw these trees like you drew the tree branches two steps ago, but as skinny as you possibly can.
|
|
Next, I decided to finish up the bridge. I added another line in the top part of the bridge, and added simple lines on the bottom part of the bridge.
I would also like to point out, I recommended not including poles in your drawings. Here, I clearly forgot about my own rules, so please ignore the pole in the rest of this tutorial. |
|
Next, I created some bushes around the trees in the back.
|
|
Now, move onto the trees towards the right. Not all of the trees are fully leaved like the trees in the back, so make a tree have very few leaves, as seen in the photo to the left.
|

|
Some trees wont show their branches, such as the tree seen in the left of this photo.
|
|
Continue adding bushes around trees. I also reccomend adding small trees in the background.
|
|
Finally, add bushes around the sticks on the left side.
|
|
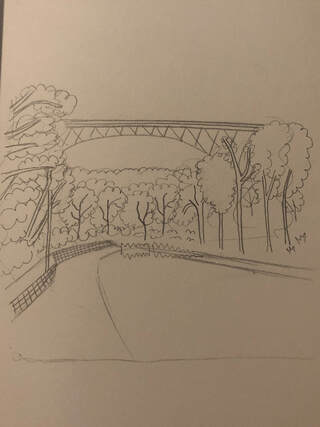
Go back to the middle and add details, such as a more detailed tree line, more bushes around the trees, and little squiggles in the grass.
|
|
Next, add another small "hill" on the right side of the lake. Feel free to add more detail to the right side of the drawing, such as grass or leaves.
After these steps, you should be done! Feel free to stop here, or if you want, continue your artwork by including colors. |
|
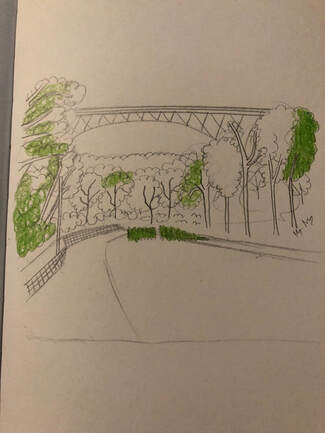
For the beginner level, you can use practically any kind of material to draw with (crayons, pencils, I don't reccomend markers since we will be blending colors here).
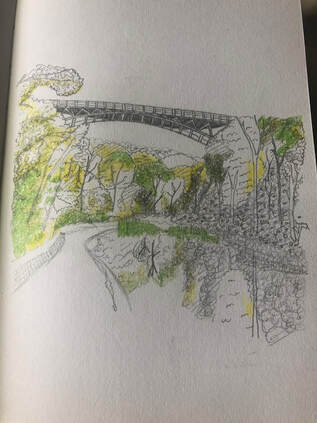
For this drawing, I reccomend the following colors: Green Yellow-Green Yellow Orange Red Light blue Grey In this photo, I'm basically showing where I colored in the green, however, where you draw the green doesn't have to be an exact copy of the original photo or this tutorial. |

|
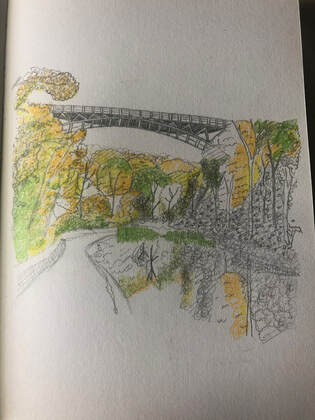
Next, I added the green-yellow. If you don't have green yellow, this is where the blending comes in. To make a green-yellow, lightly color in yellow, then lightly add green. If the color is too yellow, color in more green, and vice versa.
|
|
Next I added in the yellow.
|
|
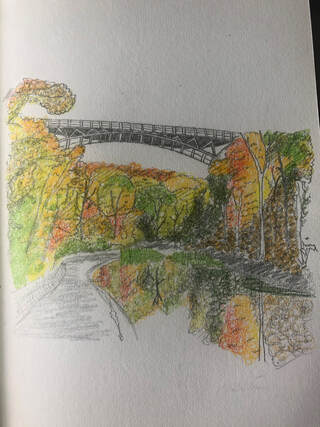
The orange is added.
|
|
Next, I added the red. For the red, apply it lightly, as red is very strong.
|
|
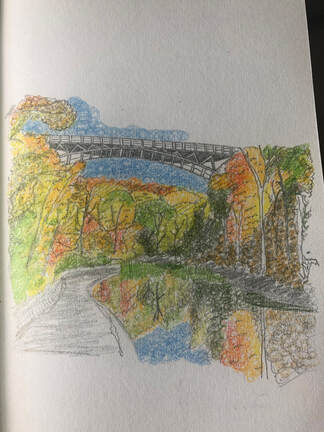
Next, add grey to the pathway and hills.
|
|
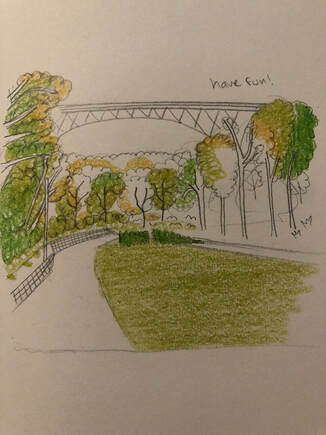
Finally, add the light blue to the sky, and you're now complete!
|
|
|
|
|
|
|
|
|
|
|
|
|
|
|
|
|
|
|
|
|

|
|
|
|
|
|
|
|
|
|
|
|
|
|
|
|
|
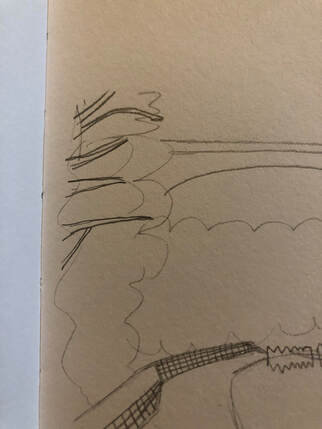
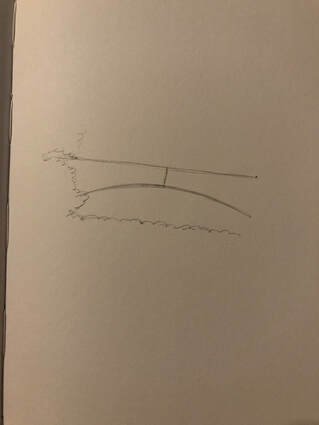
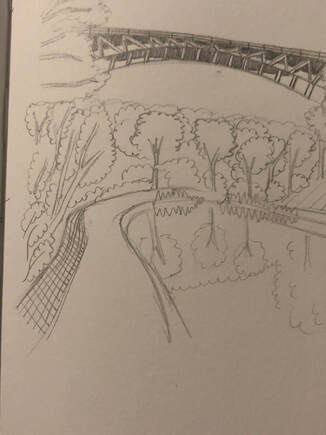
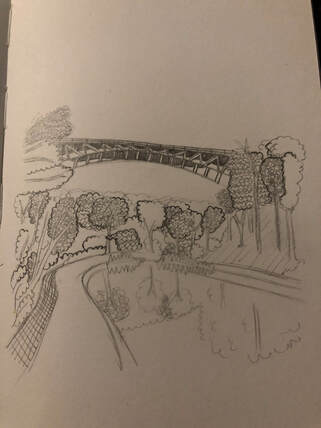
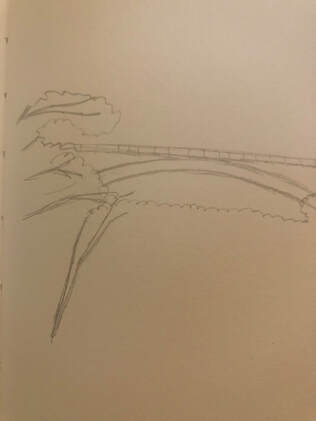
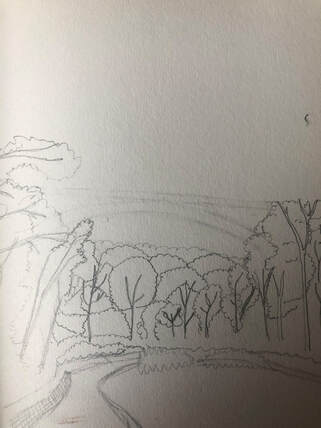
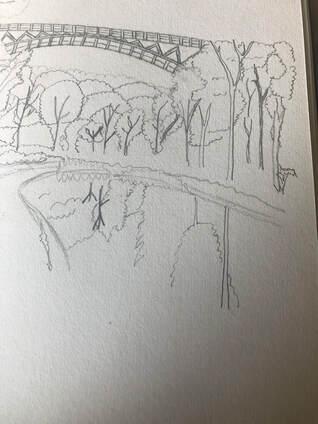
We will begin by drawing a brief outline of the main focus of the upper part of the image (the bridge), followed by a brief sketch of some trees and the tree horizon.
|
|
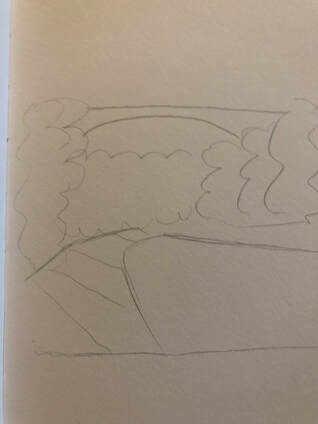
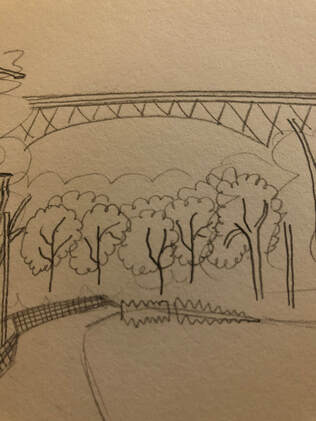
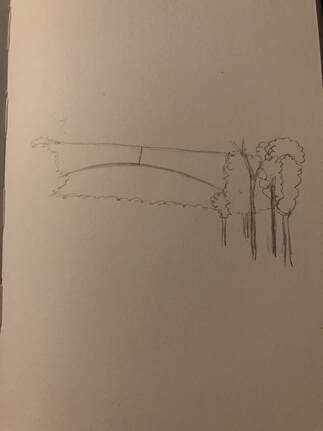
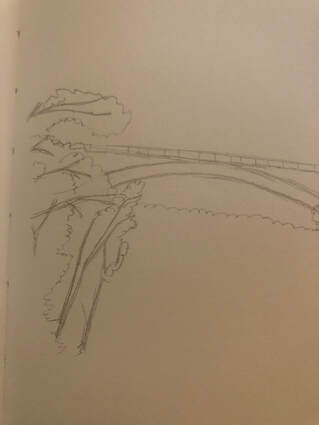
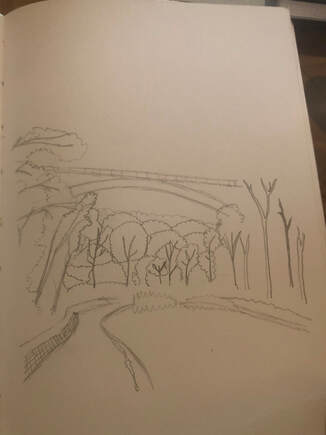
Continue working on this area and add some detail, but not too much.
|
|
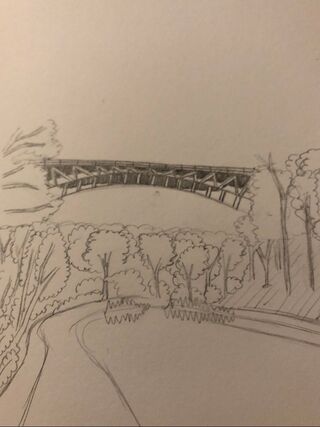
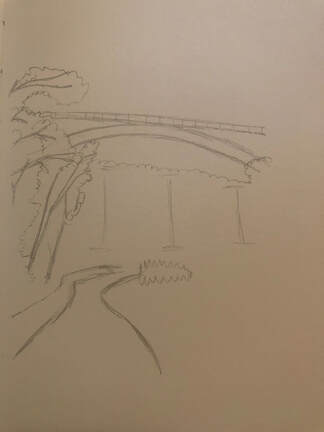
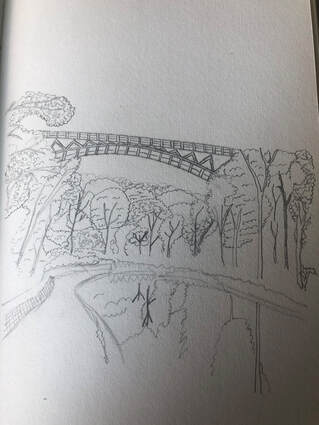
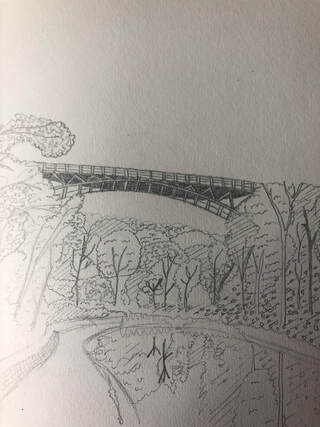
Continue briefly sketching the rest of the photo, and pay closer attention to the height of the tree horizon and where the ground is (as seen in the drawing to the left).
|
|
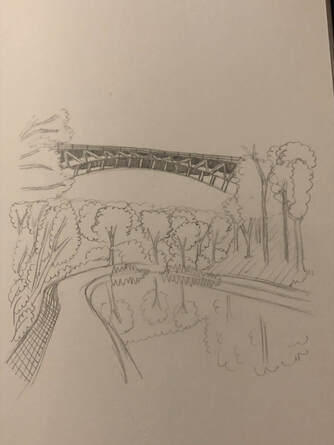
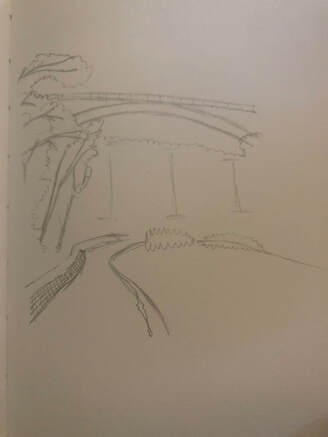
Sketch the lake in the photo similar to the drawing on the left.
|
|
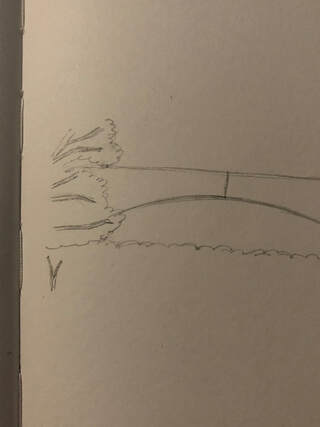
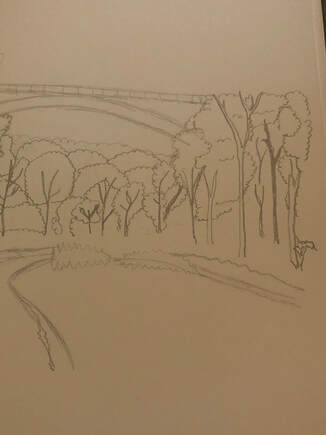
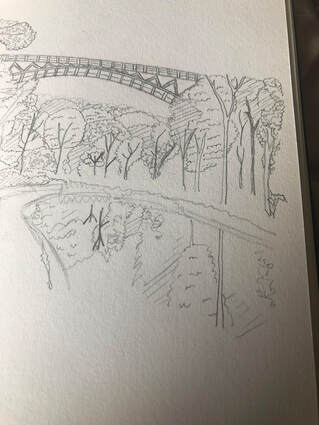
Now, draw some tree barks. They don't have to be accurate to the photo or drawing, as long as it looks quite similar to the original photo.
|
|
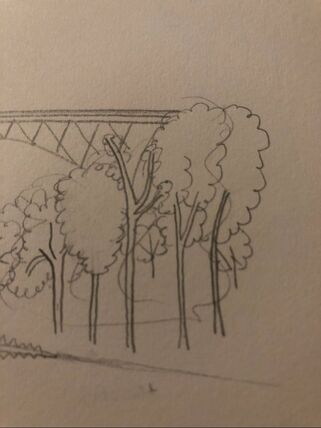
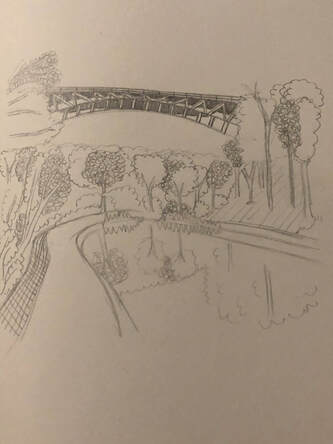
Continue working on those trees by adding some bushes to the trees further back. Make these bushes more circular.
|
|
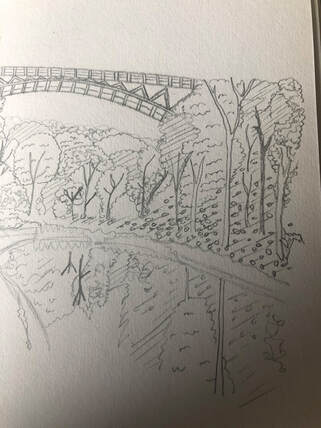
Continue adding bushes, or leaves, to the trees on the right. These bushes can be less circular, and similar to the ones on the left of the photo.
|
|
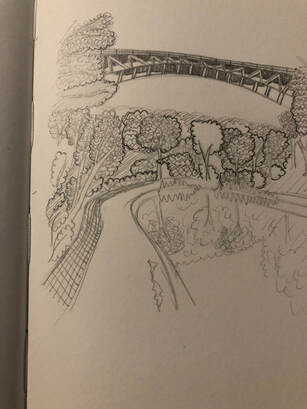
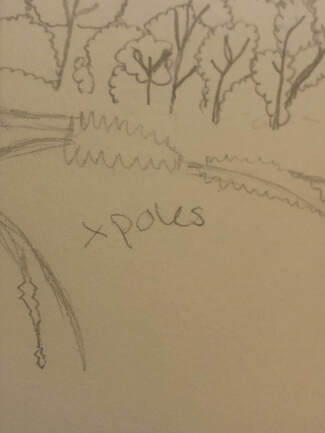
In this step, I omitted the poles as I thought they took away from the natural beauty of the photo.
|
|
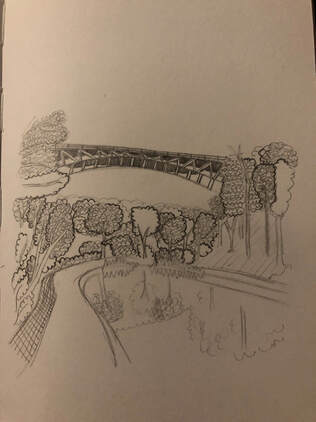
Next, I added more detail to the pathway and lake, focusing more on the shrubbery and depth of the pathway.
|
|
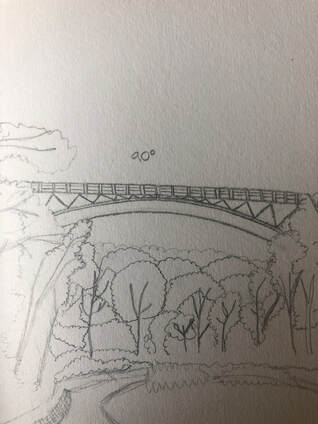
Lightly erase the sketch of the bridge, as we will now outline it and draw it with more detail.
|

|
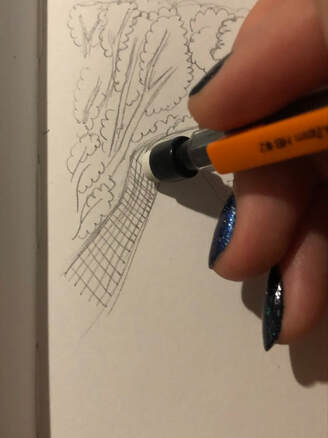
Start off with the railing, drawing a small vertical line with three horizontal lines in between, as seen in the drawing to the left.
|
|
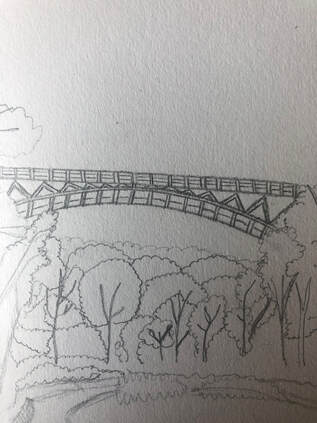
Next, focus on the lower half of the bridge. I drew the zig-zags as a basis for the outside and tried making the zig's around 90 degrees.
|
|
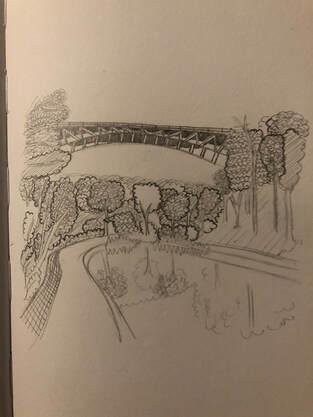
Continue adding detail as seen in the drawing to the left.
|
|
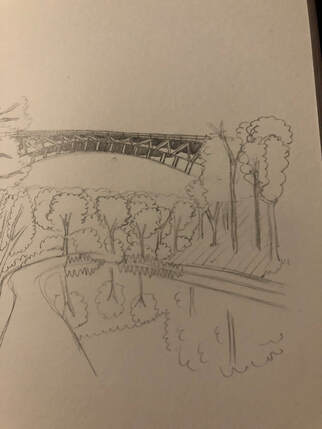
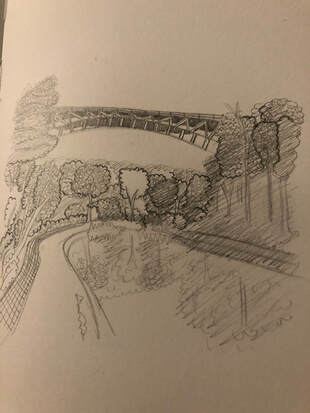
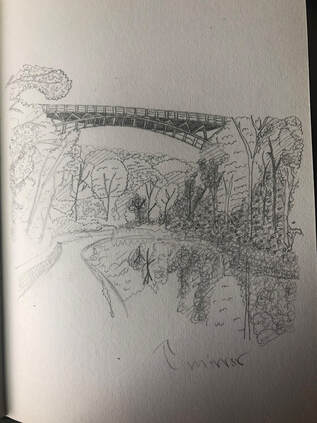
Next, I drew the reflection of the trees in the water, with the reflection not having as dark of an outline as the rest of the photo. I also began adding detail to the trees. Start off drawing a "bumpy" texture into the trees.
|

|
Continue adding texture to the rest of the trees.
|
|
For this drawing, I mainly used four different textures for the trees. If you're not sure how to draw these textures, you can find out how to underneath the Drawing Techniques tab.
|
|
After drawing the four different textures (or however many you choose to draw), I drew a soft sketch of these patterns in the lake.
|
|
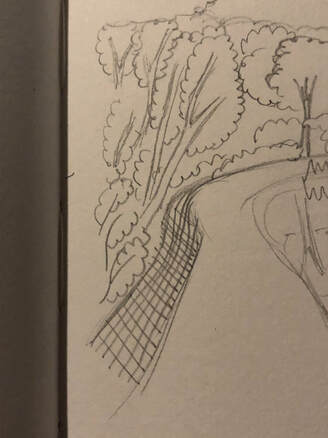
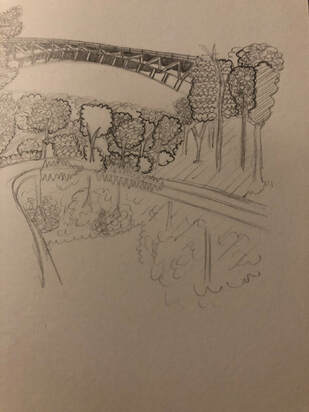
Next, I began focusing on the right side of the photo, adding a shadow texture to the ground part (which is what the lines are). You could try out any shading technique with more techniques shown underneath the Drawing Techniques tab. Don't forget to add some leaves in this step, and to reflect everything in the lake with a soft outline.
|
|
I decided (and reccomend) to go back to the bridge and shade in as is.
|
|
Now, we will begin shading everything else. Start off with the trees on the right, and I reccomend using a circular shading technique as it looks best on trees. Focus more on shading the "ground" part in this step, as the trees cover a lot of light from reaching the ground. Make sure to reflect this in the lake.
After this step, you are technically finished, but I reccomend continuing the tutorial and coloring in the drawing, as it truly brings the drawing together. |
|
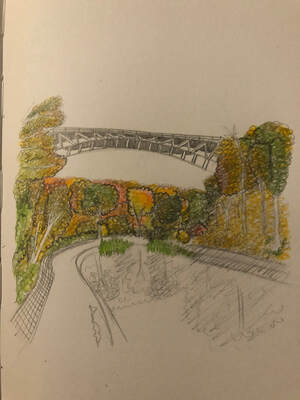
For coloring, I reccomend the following colors:
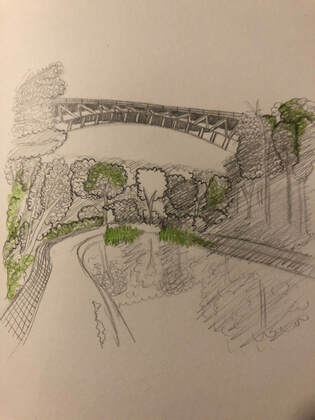
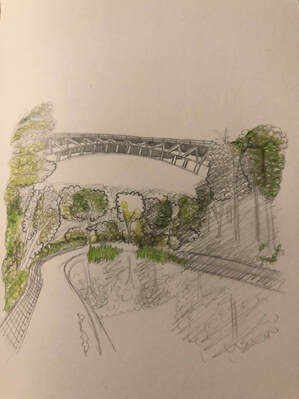
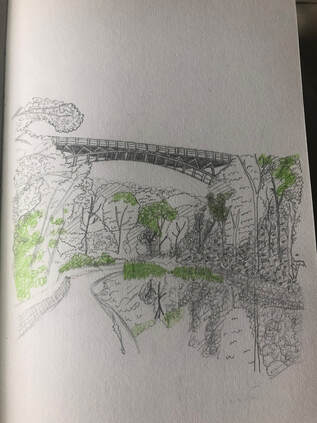
Green Light Green Yellow Orange Red Sky Blue Olive Green - tip: if you don't have a color like olive green or sky blue, mix some regular colors together to try and achieve some unique colors! So for olive green, mix regular green with a bit of yellow and brown. And for sky blue, softly mix regular blue with some white. And for the first step, color in green in the areas as seen in the photo to the left. |
|
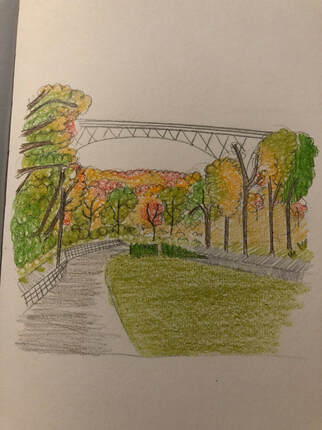
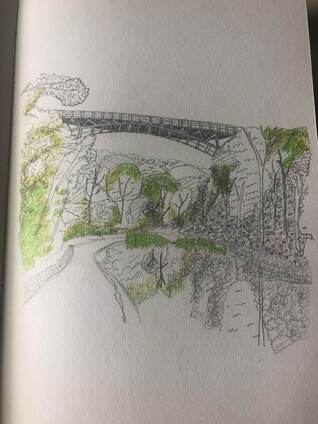
Next, add light green close to where you just colored in the green, and feel free to mix the light green with the regular green. Blending really helps make the color pop. Also, remember to color in the lake as well.
|
|
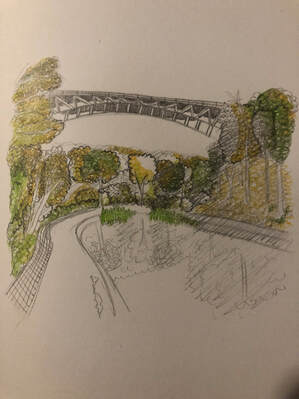
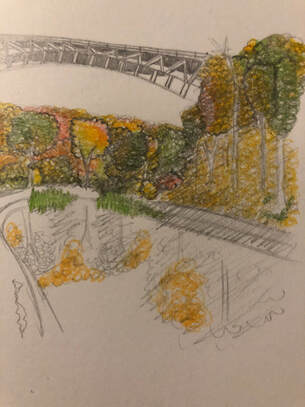
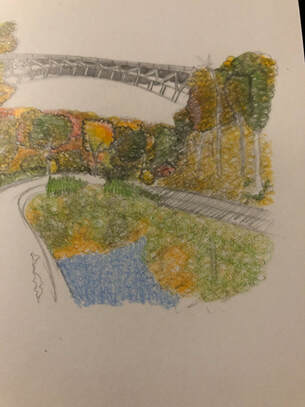
Continue coloring with yellow, although don't make the yellow close to the light green like we did with the light green and regular green.
|
|
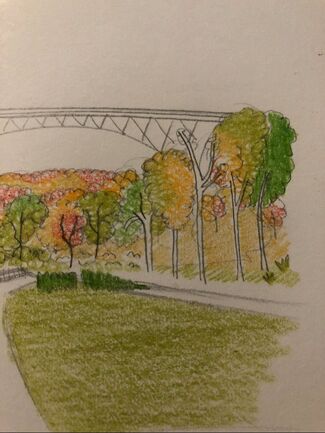
Next, add orange, and you can be more generous coloring in orange.
|

|
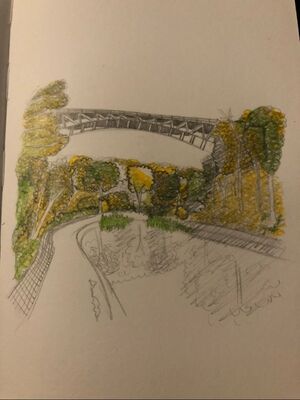
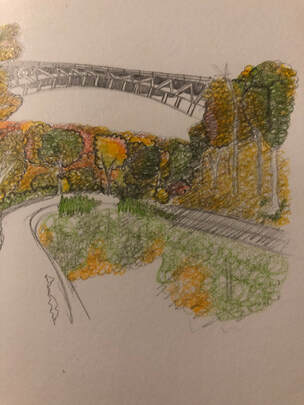
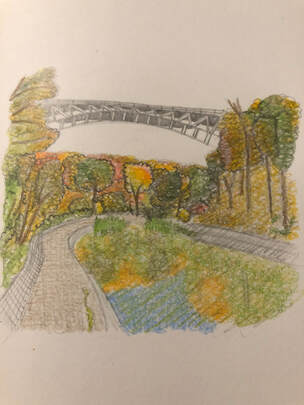
Next, softly add the red, as it can be a very intense color.
|
|
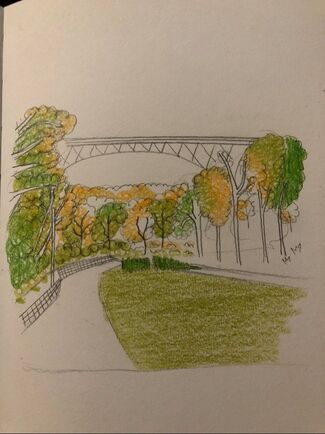
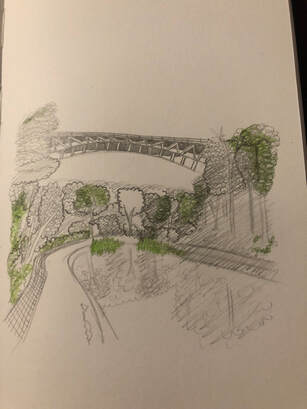
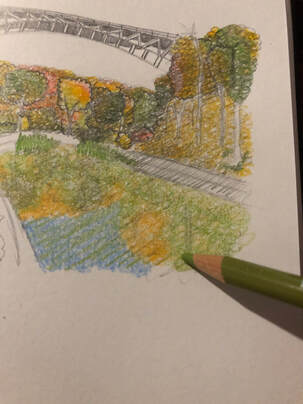
At this step, I colored in the remaining parts that were not colored, either because I forgot or because I wanted to color in some parts first (such as the trees on the right being colored in before the slope). I also reccomend lighting going in with yellow all around the drawing, as it makes the colors pop out even more.
|
|
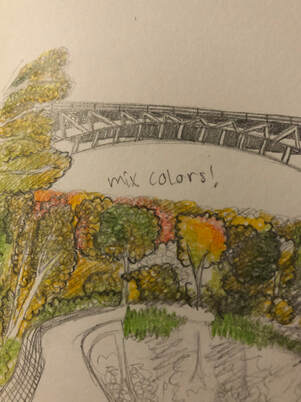
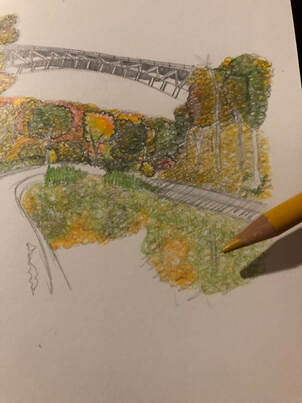
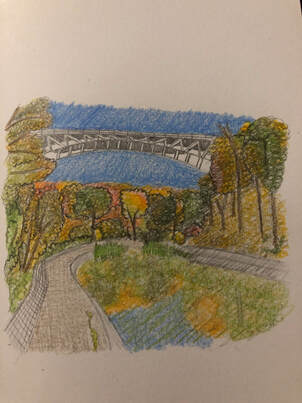
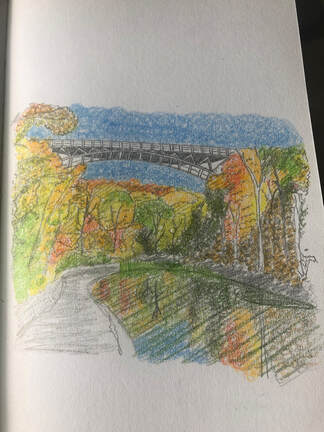
Next, begin coloring in the sky + lake reflection.
|
|
After coloring the sky, finish off with a light shade of green in the lake, and for this drawing I got a bit creative and did straight lines, as seen on the photo to the left. You can simply lightly shade green if you do not want to replicate this lined look, but after this final step, you are done!
|
