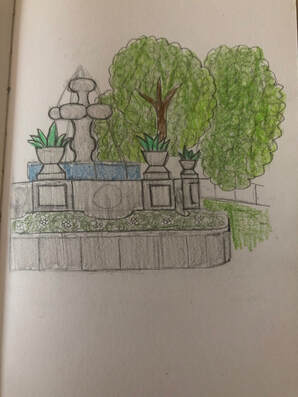
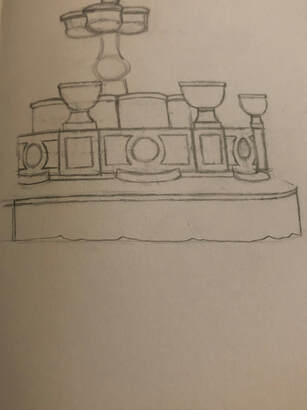
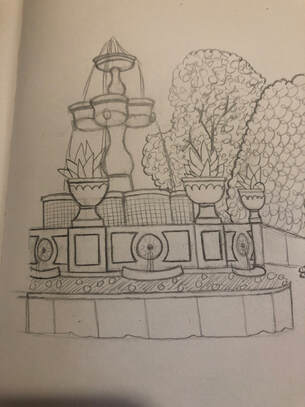
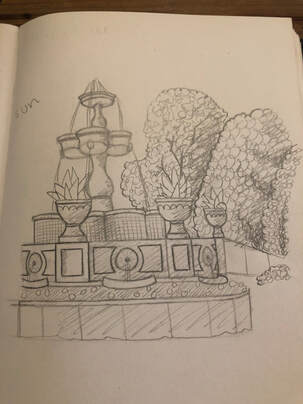
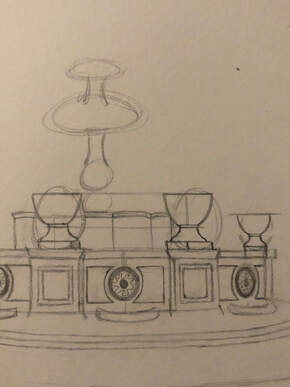
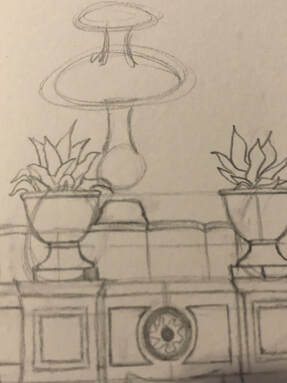
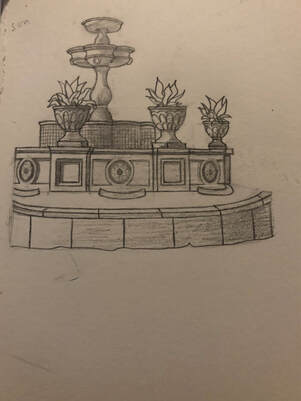
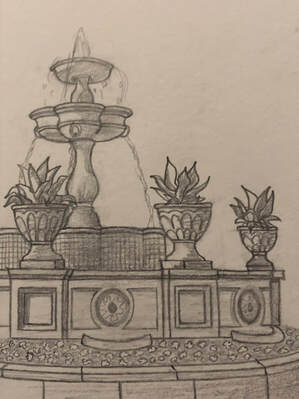
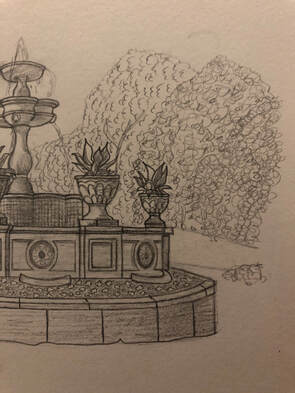
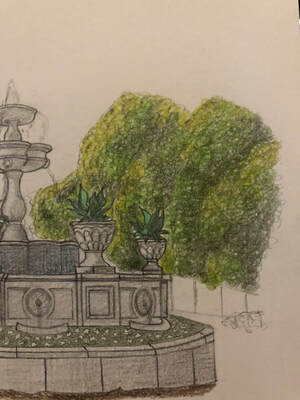
Drawing #1: Highland Park
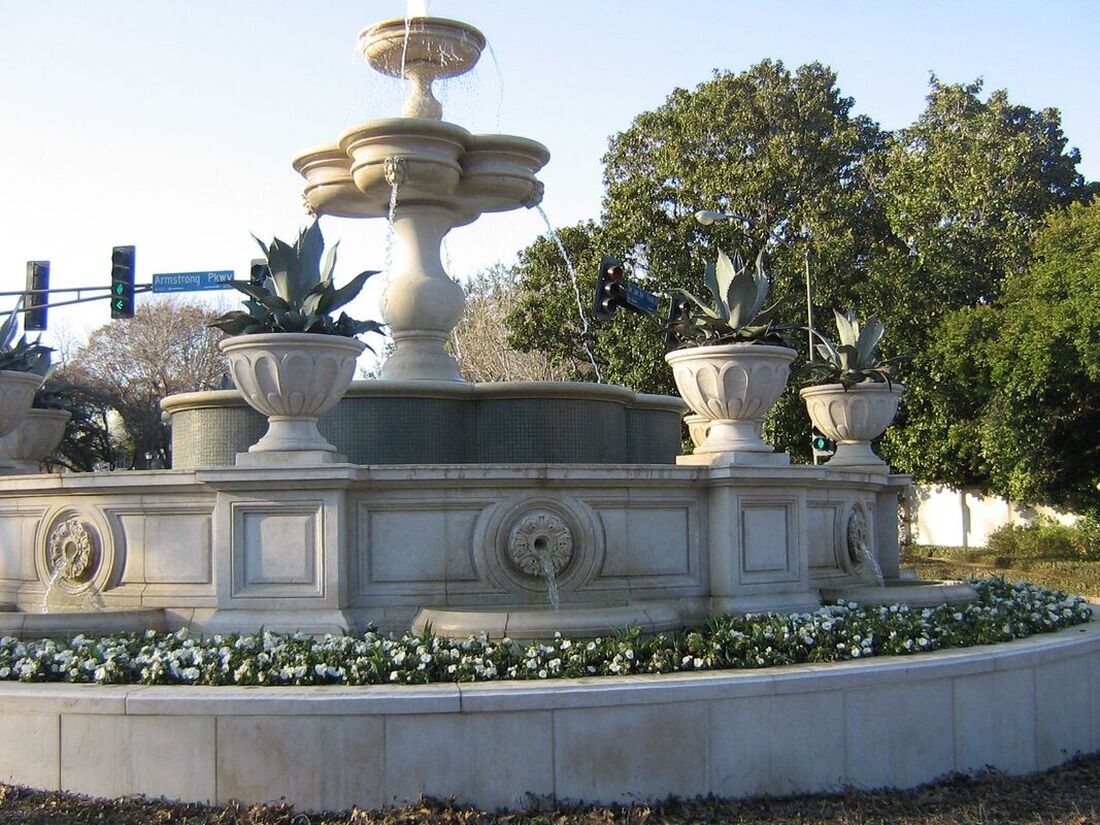
Not all parks have to be filled with trees or flowers or bushes, some parks like Highland Park can have a lovely fountain which compliments the bushes and trees surrounding the fountain. For this drawing, the traffic lights in the background can be ignored/ not included in the drawing, since it kind of takes away from the natural scenery of the fountain and trees.
For this drawing, you will need a graphite pencil, an eraser, and a sharpener if your pencil is not mechanical.
Estimated drawing time: 45 minutes - 1 hour
For this drawing, you will need a graphite pencil, an eraser, and a sharpener if your pencil is not mechanical.
Estimated drawing time: 45 minutes - 1 hour
|
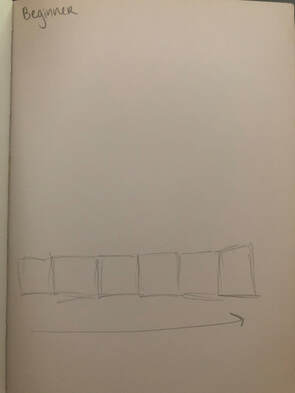
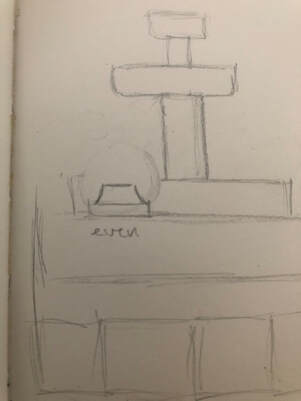
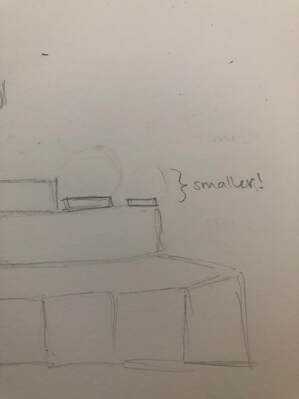
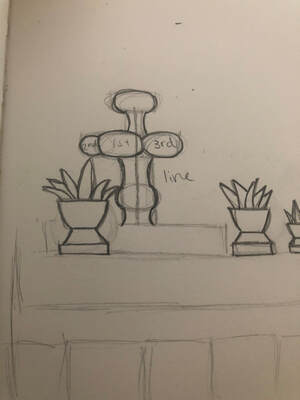
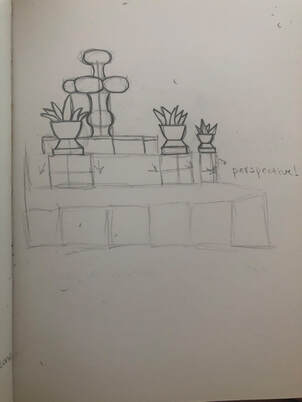
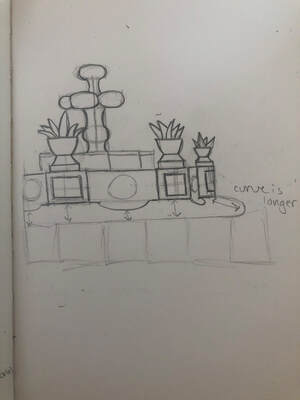
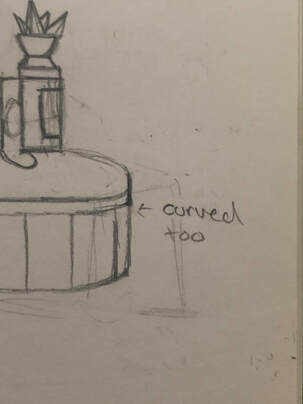
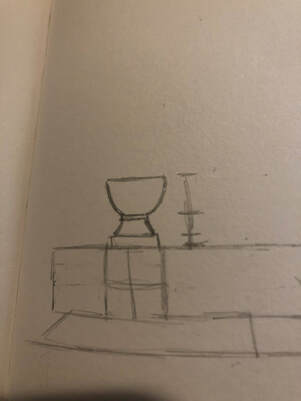
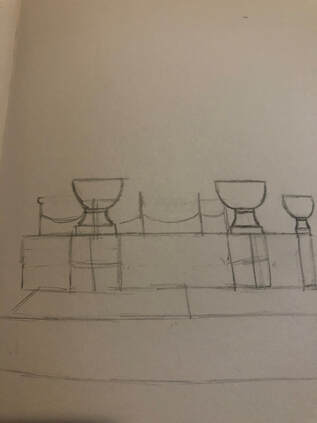
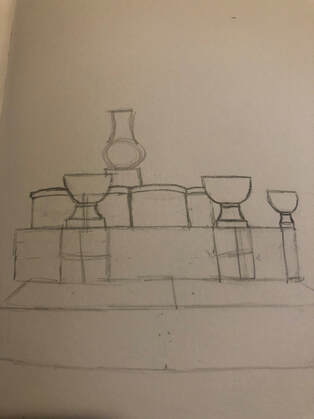
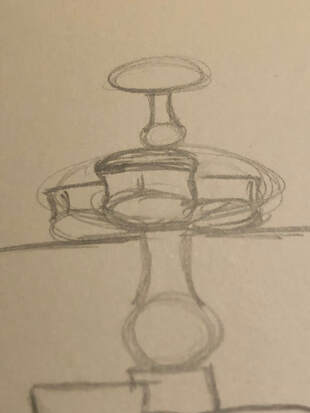
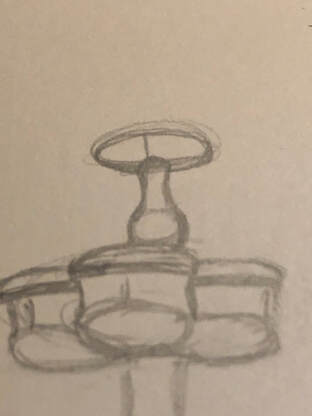
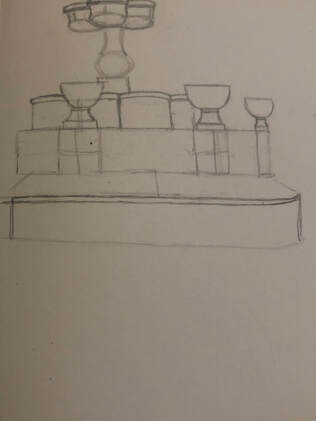
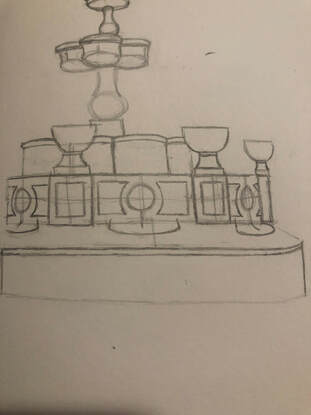
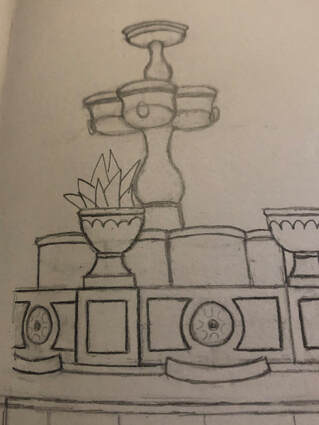
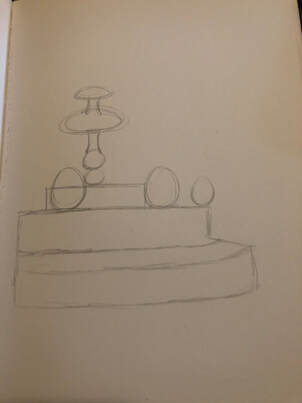
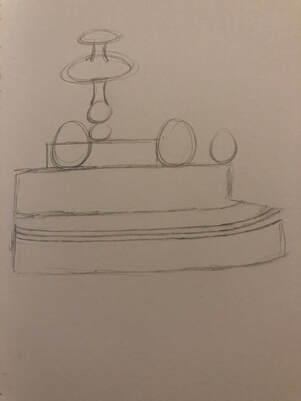
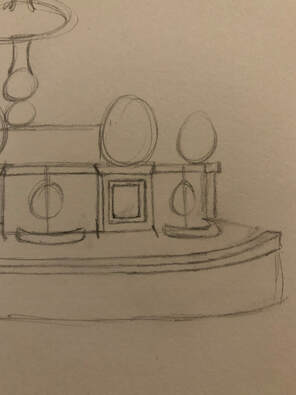
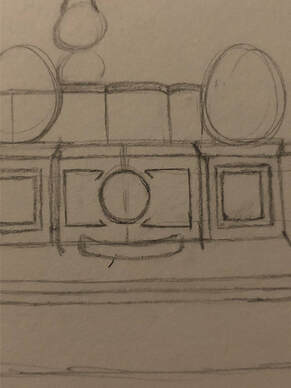
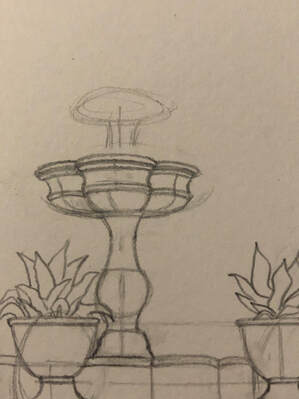
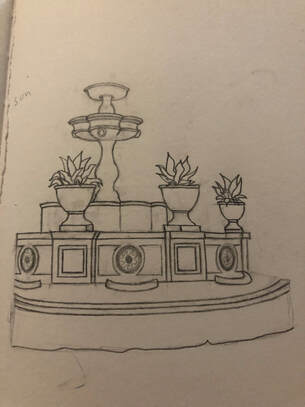
First, we want to focus on the base of the fountain, as we will build the fountain up from the base. Start off by drawing six squares, all about the same size. This is only the "skeleton", so it does not have to be perfect.
|

|
Since we're building up, we will add the next layer of the fountain, which is a bit shorter and skinnier than the base.
|
|
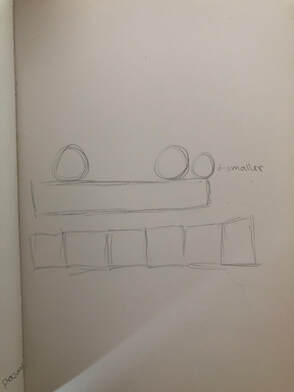
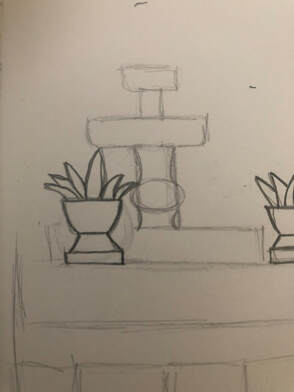
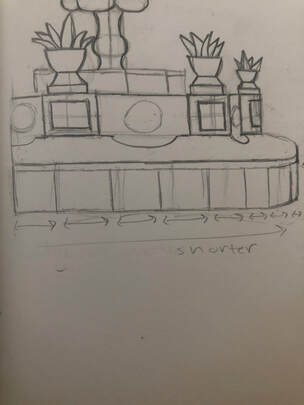
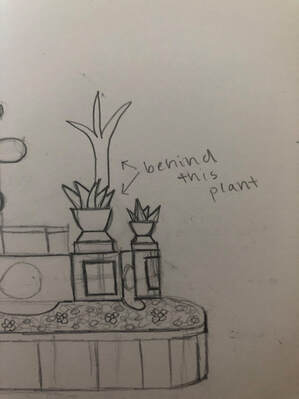
Now, we will draw in the "skeletons" for the potted plants. The shape doesn't matter, since we will later be erasing the skeleton, thus I choose a circle to make as the skeleton. I recommend you also use a circle, but feel free to use any shape!
Don't forget to make the furthest right plant a bit smaller than the other two, since its further away from the camera/ other two plants. |
|
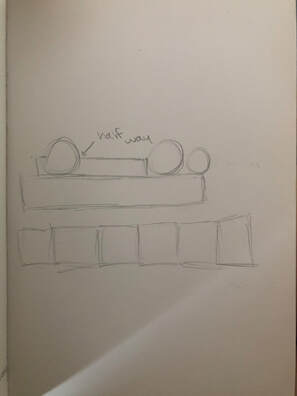
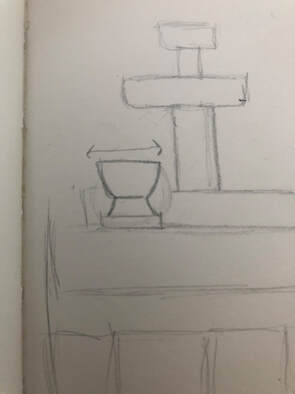
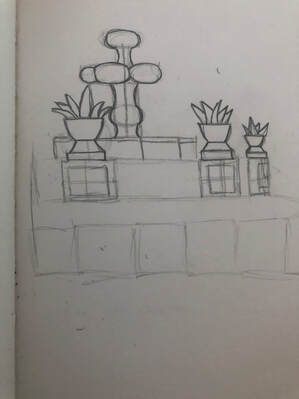
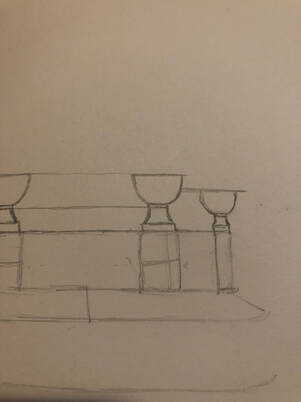
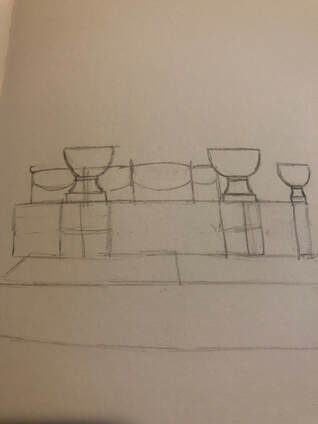
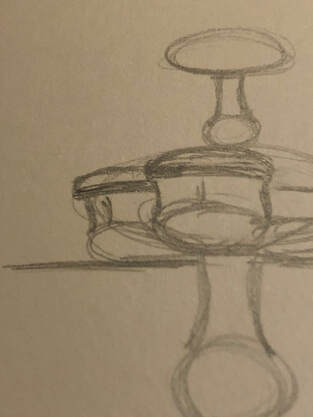
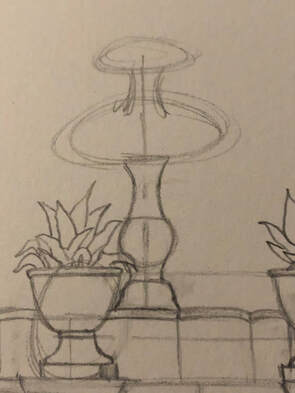
Now we will draw the next layer, which will be half the height of the potted plants.
|
|
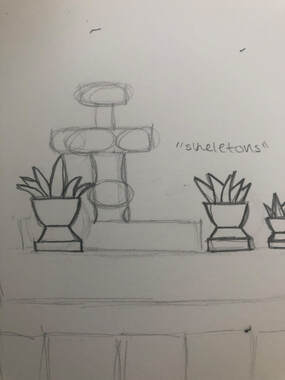
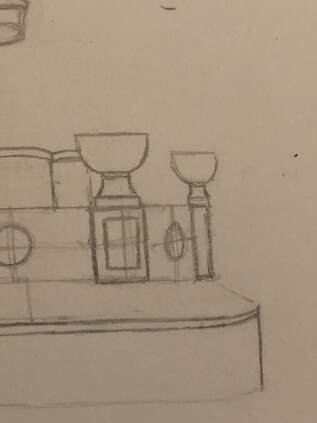
To finish off the skeleton of the fountain, we will draw a rectangle as seen in the photo, then another layer like the one previously drawn, just smaller (both shorter and a little skinnier). Repeat the same steps to draw the final layer/ the top of the fountain, and now the skeleton of the fountain is complete.
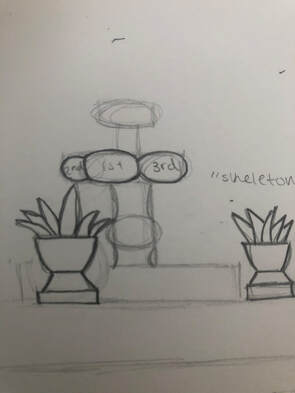
To make sure that the top half of the fountain is drawn correctly, check the spacing of the potted plant with the top half of the skeleton, and make sure it's similar to what is seen in the photo. Remember to go back and make any corrections if needed. |
|
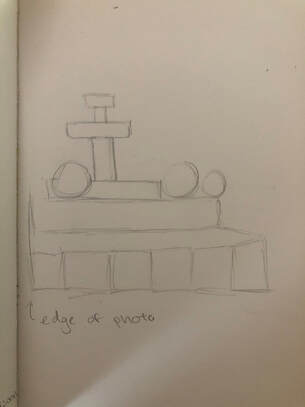
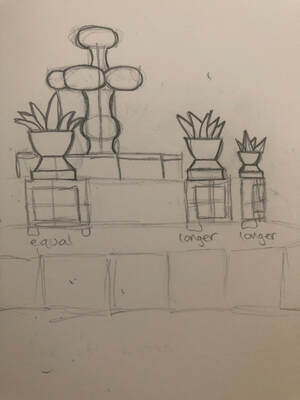
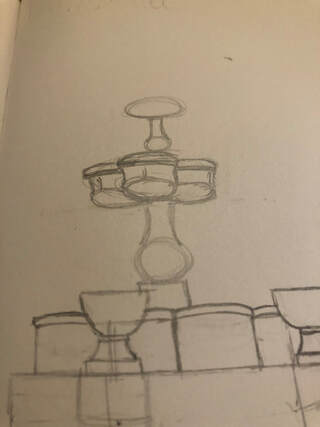
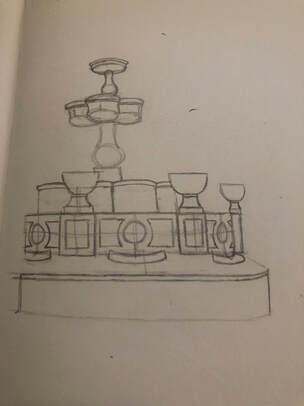
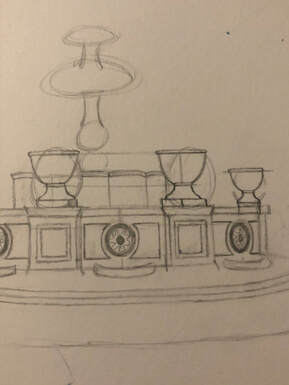
For reference, I added a line to show where the edge of the photo and drawing is, although we will do a little improvisation later on (you will see what i'm talking about).
|
|
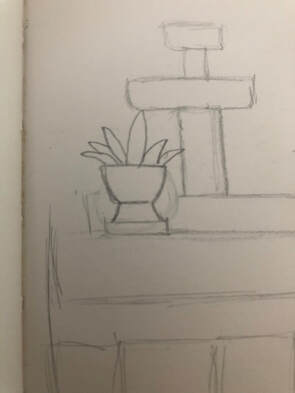
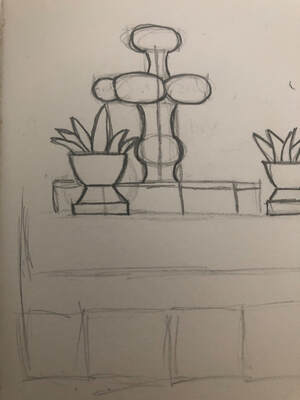
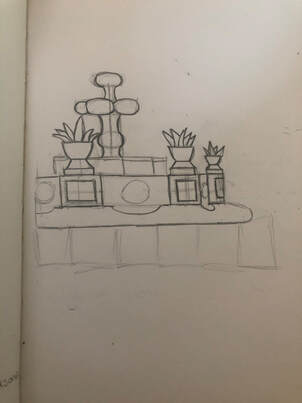
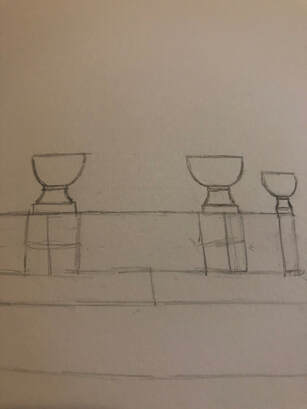
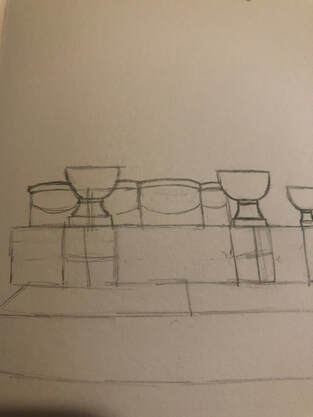
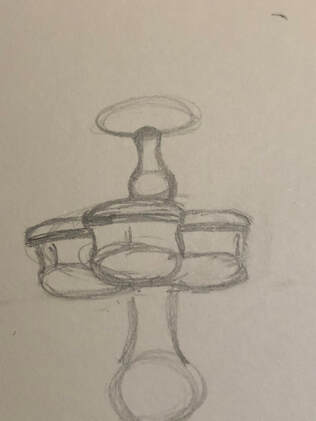
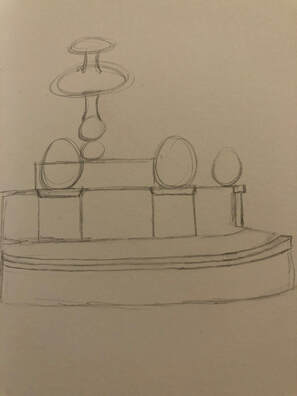
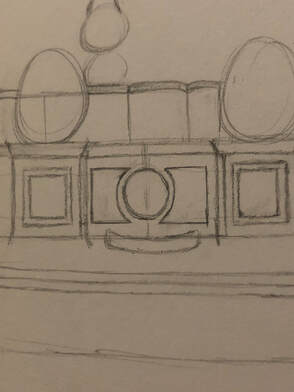
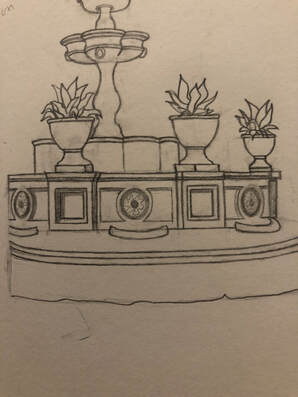
Now, we will go into details with the plants! First start off by erasing the skeletons, but leave a small amount of skeleton (it will help us with perspective/ point of view).
|
|
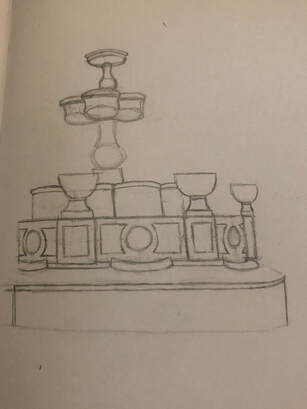
Start off with a flat base as seen in the photo, on the bottom of the "skeleton".
|
|
Then add a trapezoid like shape on top. Make sure the left and right side of the trapezoid are even.
|
|
Next, add a bowl like shape on top, making the edge of the bowl the same length as the flat rectangle at the base of the potted plant skeleton.
|
|
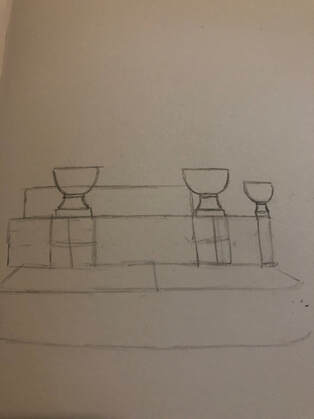
Next, add some aloe shaped leaves out of the bowl. It doesn't have to be exactly like the photo, so feel free to improvise - but remember to keep a realistic shape.
|
|
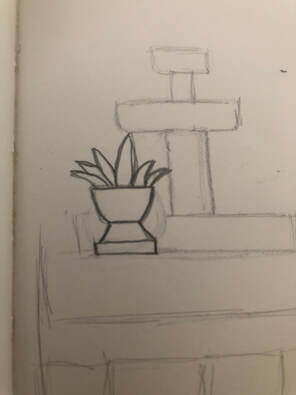
Next, outline the whole potted plant.
|
|
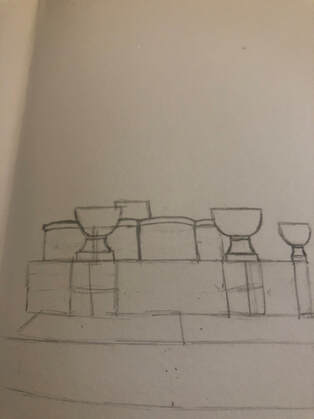
For the other two potted plants, you will follow the same steps as before, except the plant furthest to the right will be a tad bit smaller, since this potted plant is further back from the other two.
|

|
Don't forget to outline once finished! And make sure the leaves look similar to those in the photo.
|
|
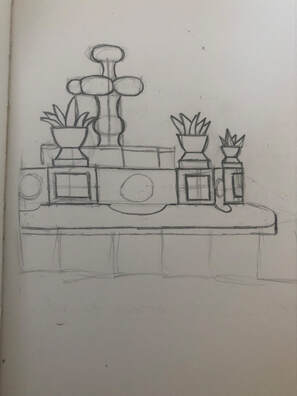
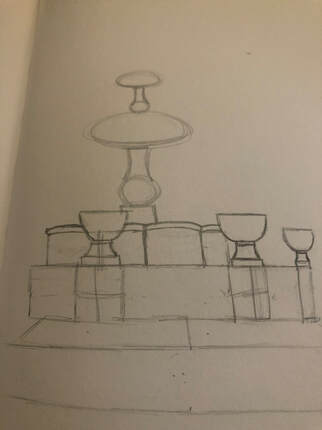
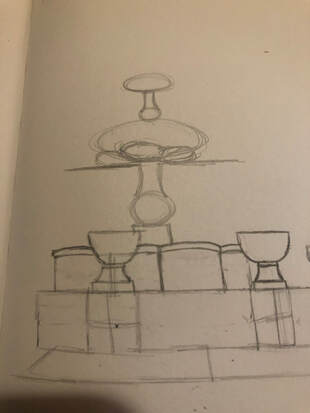
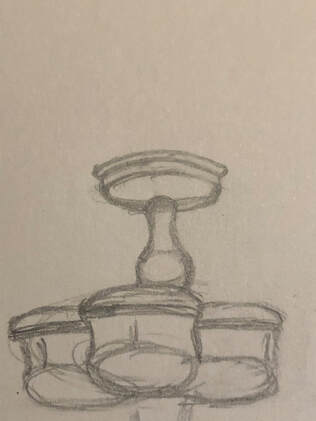
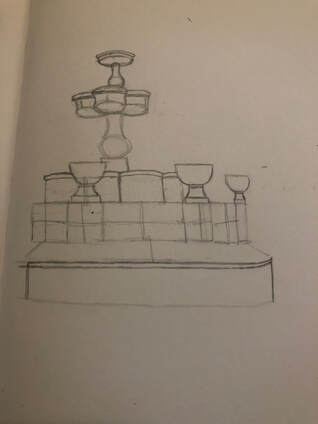
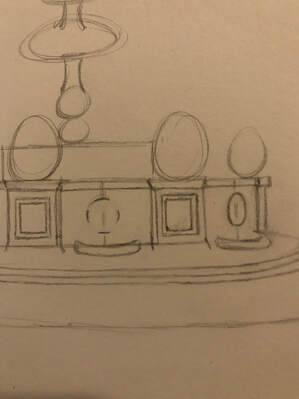
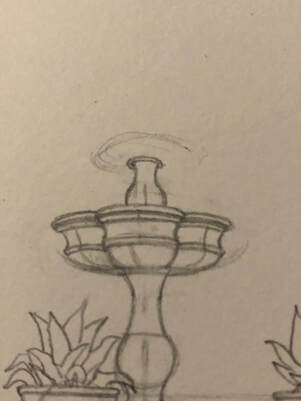
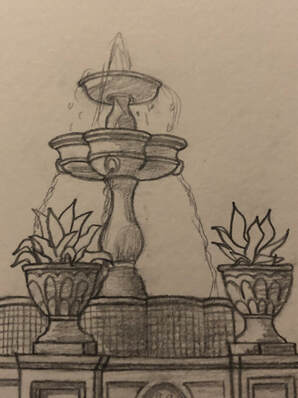
Next, we will work on outlining the top half of the fountain. Start off by making a vase-shape into the vertical rectangle. To help with curvature, I recommend making a small, wide oval as seen in the photo.
|
|
Following upwards, create 3 wide ovals like you just did, but don't draw them on too hard. These will be our skeletons, and in the next step, we will outline these skeletons. The oval on the left and in the middle should overlap, and the oval in the middle and on the right should just be touching.
|
|
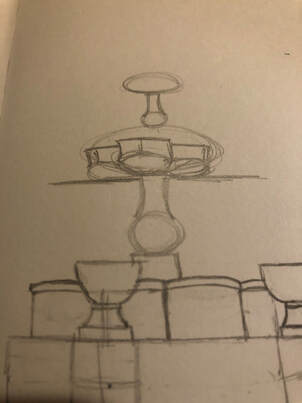
Next, we will outline. I put the numbers as to indicate which oval should be outlined in which order.
|
|
Now, finalize the shape on the very top of the fountain by drawing a similar curve that you drew just a few photos before. Of course, remember that this top part is smaller, so keep that in mind while drawing. Once you finish drawing the top part, outline the whole top half as seen in the photo.
|
|
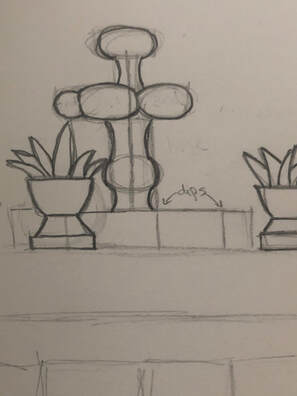
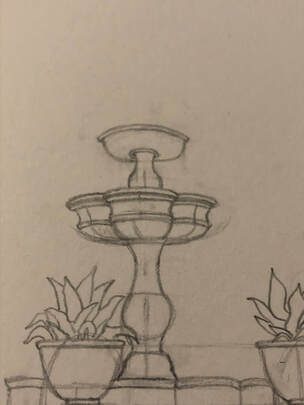
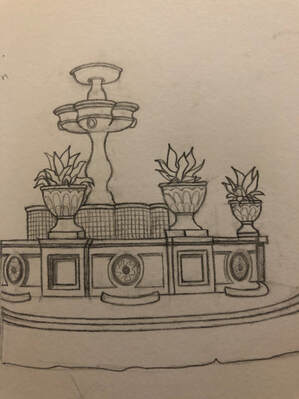
Next, we will focus on the layer in the middle. In the photo, this layer appears 3D like. However, for the beginner level, we will not be too focused on making it seem 3D. Simply draw straight lines as seen on the left, as that is where the dips for the 3D objects would be.
|
|
Next, add a thin line at the top of this layer. You can simply draw a straight line all the way through, and you don't have to make stops like I did.
|
|
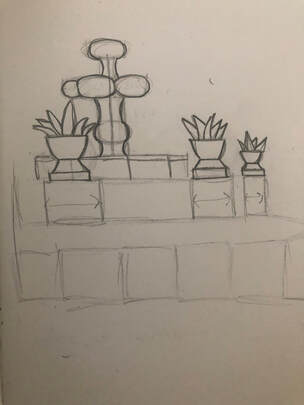
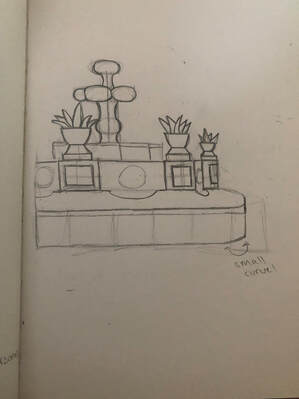
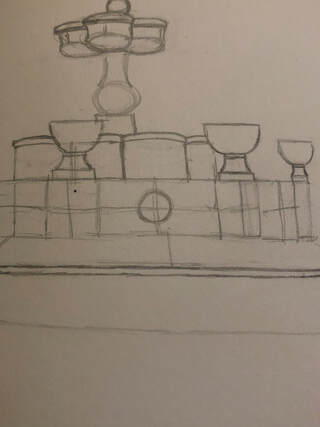
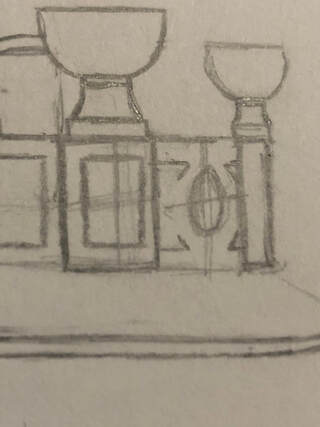
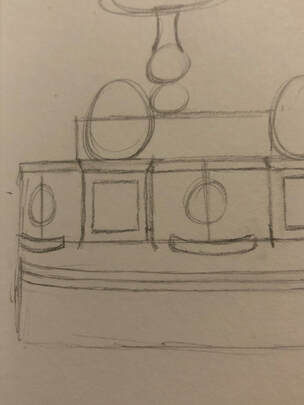
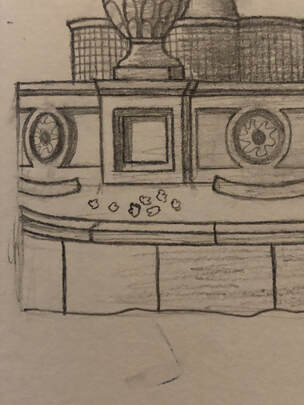
Next, we will focus on the layer below the potted plants. First, make some boxes below the potted plants. However, do not make a box for the potted plant all the way to the right. Instead, make a rectangle similar to the one seen on the left.
|
|
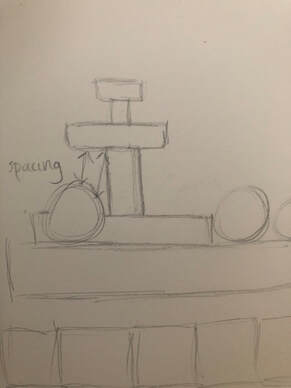
Now, we will add some detail to these boxes. However, we first need to understand the perspective of these boxes/ this layer of the fountain. Notice how I have the arrows pointed out. This is the direction these boxes are facing in real life. This will help you understand how to draw the details in the next step.
|
|
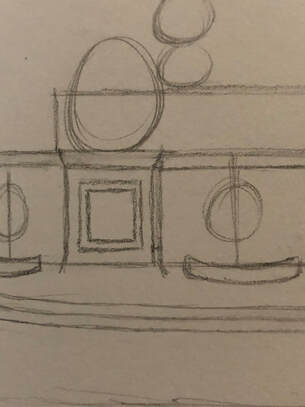
Notice how I drew a smaller square inside these boxes. The box all the way to the left is already facing towards the camera/ viewer, so we simply create a smaller box inside the box. The box in the middle does not directly face the viewer, thus the
|
|
Make sure that the sides of all 3 boxes in this layer are similar in width to those shown in the photo to the left; the leftmost box is equal on both sides, the middle box's left side is slightly longer than the right side, and the rightmost box's left side is significantly bigger than the right side.
|

|
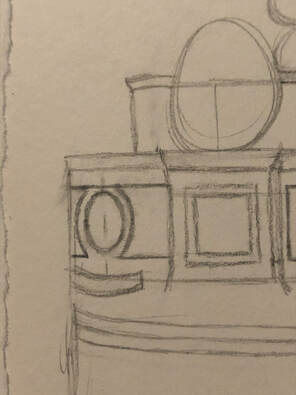
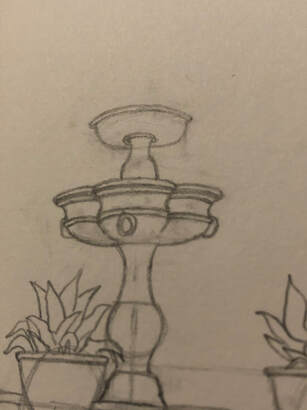
Next, outline these boxes, and draw some circles in between each box. Make sure the rightmost circle is very skinny, as seen in the photo to the left.
|
|
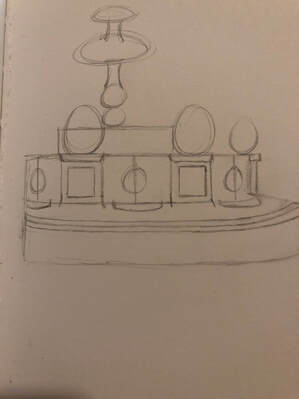
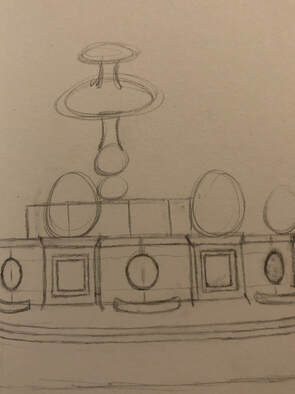
Now we will work down, drawing lines similar to those seen in the photo to the left. Make sure to constantly think about perspective, and how that has effected how we are drawing things.
|
|
Now we will focus on the curve of this lower layer. Draw it similar to the photo to the left, and beware of the distance between that layer and the layer above it.
|
|
Outline this lower layer.
|
|
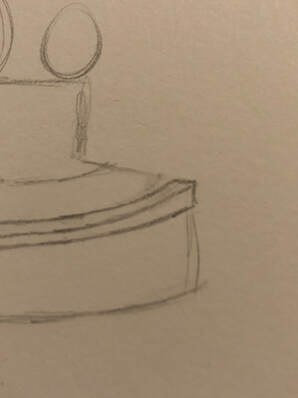
Continue working downwards, and we will work on the lowest layer. Add a small layer as seen in the photo to the left.
|
|
Now draw a straight line at the bottom of the layer - aka the base. However, make sure to curve the rightmost part of this layer.
|
|
I had to go back and fix that skinny layer to make sure it curved as well - you might have to do the same.
|
|
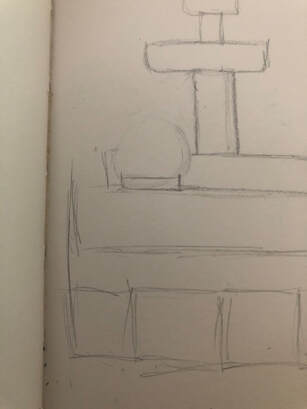
Now, we will work on the lines, or spacing, for the blocks that make up the bottom layer. As we move to the right, these lines will move closer and closer.
|
|
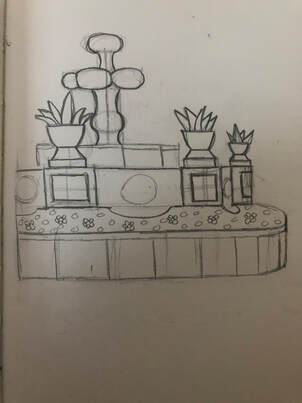
Next, we will move back to the layer above, and draw some small flowers and circles.
|
|
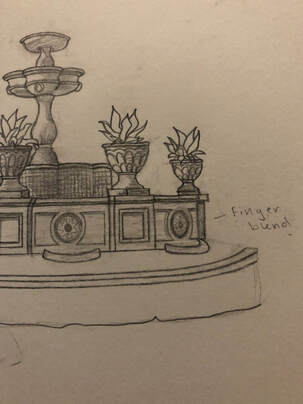
To finish off the flower layer, I added some squiggles. To help you understand how I drew these squiggles, I highly reccomend going to my Drawing Techniques tab and watching a video on how to draw squiggles, since a still image isn't the best explanation.
|
|
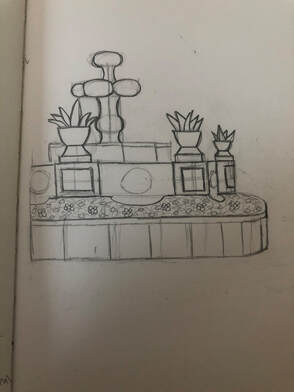
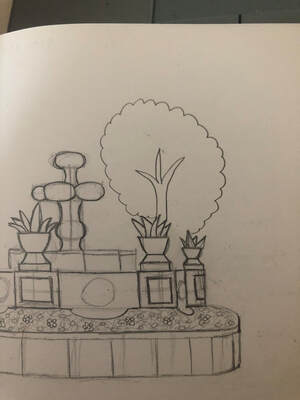
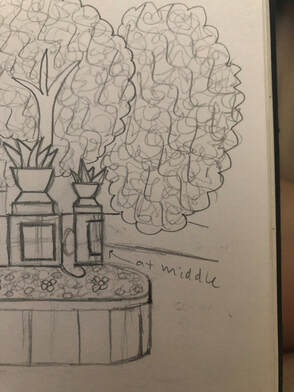
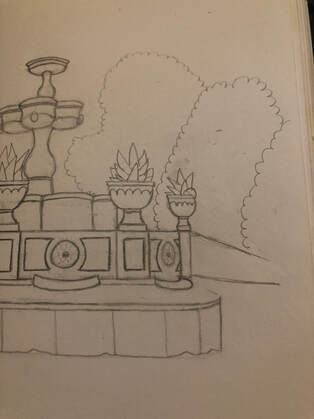
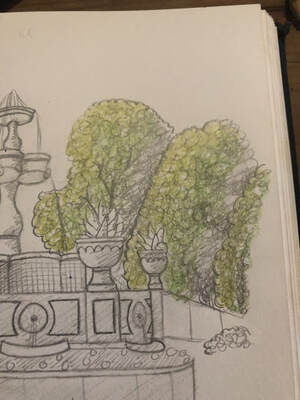
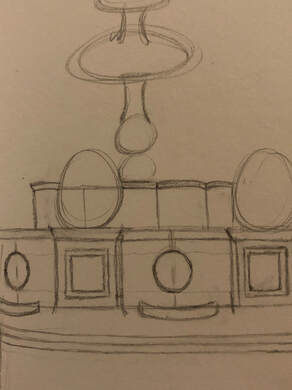
Now we will focus on the background. Begin by drawing a tree bark behind the middle plant as seen in the photo to the left.
|
|
Draw a simple bush shape around this tree bark, making a tree shape.
|
|
Add another bush shape to the left, and to the right.
|
|
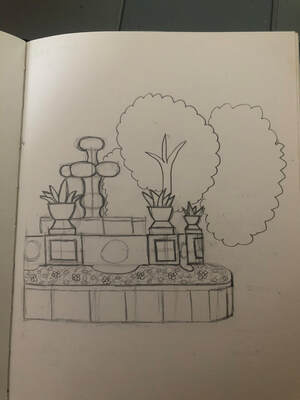
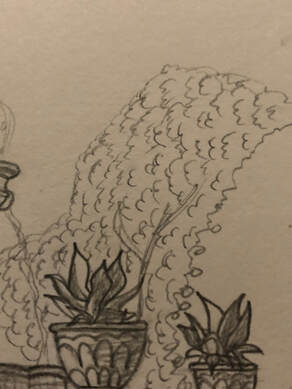
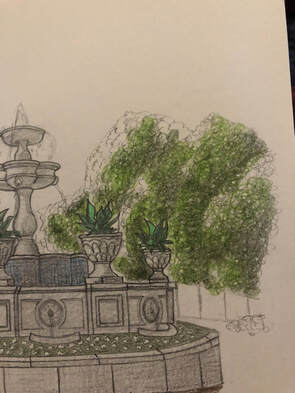
Now, we will add patterns to the trees. We will be using the same pattern for all three trees. I decided to add two kinds of patterns to the trees, but feel free to add whatever patterns you'd like!
The first pattern I drew are the simple waves, seen on all three trees. Then, I added on squiggles. As previously mentioned, feel free to look at the Drawing Techniques tab if you can't figure out how to draw these squiggles. |
|
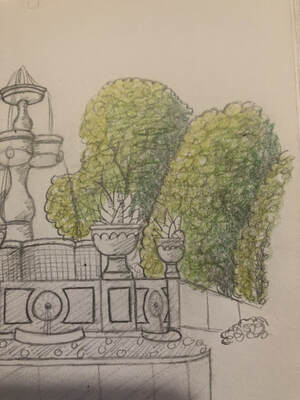
After adding the patterns to the trees, I moved onto the rest of the background. I first started off with a fence, with the top coming out of the fountain. I drew the bottom of the fence coming out the middle of the square on the fountain, as seen to the left.
|
|
Next, I drew some lines into the fence, and added small details to the grass.
|
|
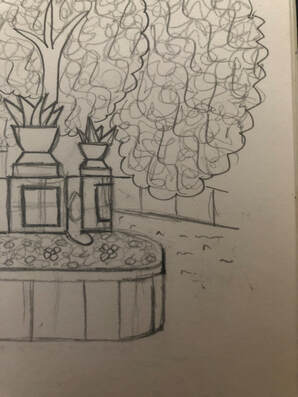
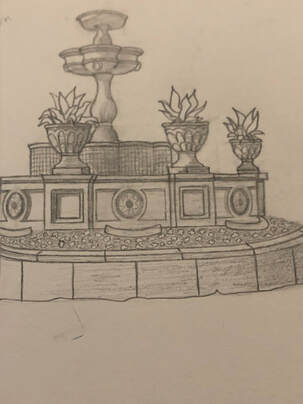
Finally, go back and erase any "skeletons" you still see in your drawing. This will help the drawing look cleaner and more pristine. Don't worry about erasing too much, as you can easily re-draw anything you accidentally erase.
|
|
Finally, I added the water part to the fountain. To draw the water, simply draw streaks coming out the middle of the ovals.
|

|
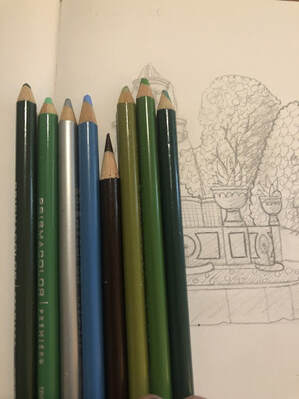
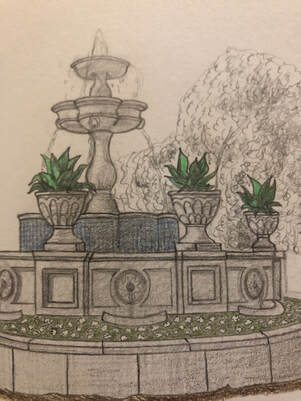
Now, you're finished! You can stop here, or you can add colors to really make the drawing pop! If you do add colors, you will need:
Light blue Green-blue Green Grey Brown |
|
Add the light blue to the middle part of the fountain, add green-blue to the plants on the fountain, and color in the rest of the fountain grey. With your green, color in the flower layer (but not the flowers), the trees in the back, the grass, and finally, color in the tree bark with brown.
|

|
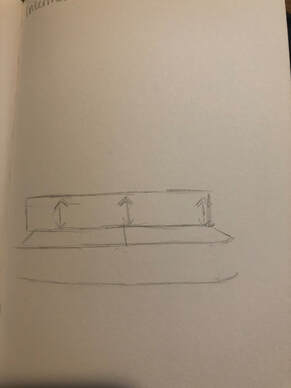
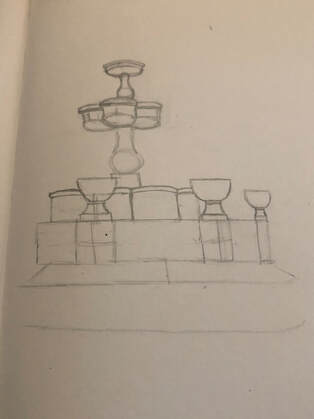
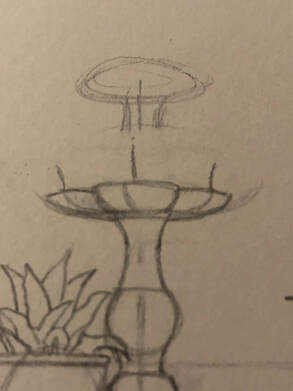
First, we will start off with the bottom of the fountain. Begin by drawing a "skeleton" of this part of the fountain. Keep in mind the distance and length of everything while you draw the skeleton of the fountain, as you will be using the skeleton to finalize the outline the fountain.
|
|
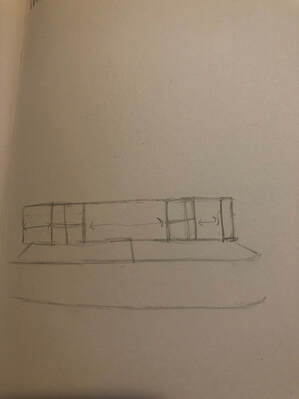
Next, add the layer on top.
|
|
In this same layer, add in some boxes as seen in the photo on the left. I added the pluses inside the boxes to help you understand perspective/ dimension, as this level will delve into 3D drawing.
|
|
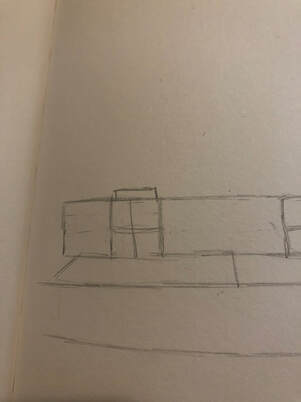
Working up, we will add a small flat rectangle above the leftmost box.
|
|
On top of this flat box, add a plant pot. Make sure the proportions you draw are similar to the proportions in the photo to the left.
|
|
Draw this same pot for the other two flat boxes. However, make the rightmost pot smaller, since its further away from the camera. I used straight lines to make sure the pots were alligned/ straight.
|
|
If you use the lines, you can erase them after this step.
|
|
Now we will work on the upper layer. Add a rectangle as seen in the photo to the left.
|
|
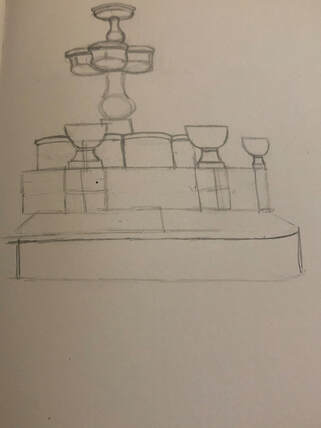
We will "cut" this rectangle into four more parts as seen in the photo to the left, and I drew the flat Cs in the middle to help with perspective and dimensions. You will also want to erase the tops.
|
|
With the naked tops, draw some lines as seen in the photo to the left. Make sure these lines aren't straight, as they have a slight curve.
|
|
Close off the top part of this layer.
|
|
Erase those Cs in the middle of that layer, and we will continue working up. Add a small rectangle as seen in the photo to the left.
|
|
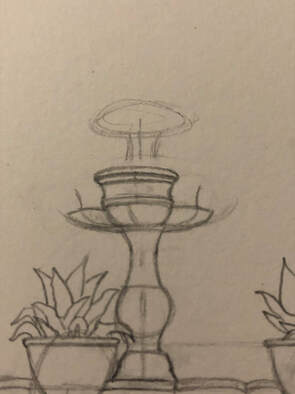
Add a circle on top of that rectangle, and a vase-like shape on top of that circle.
|
|
Keep adding shapes moving up (these are skeletons for the upper part of the fountain).
|
|
Now below the wide oval, add three circles as seen, and two lines pointing out in opposite directions.
|
|
The two lines are used as a refence of where the "left" and "right" bowls are facing, and is overall used to help understand perspective and direction. Continue drawing the fountain by adding the curved rectangle shape above each circle, as seen in the photo to the left.
|
|
Draw a little slab on top of each cone in this layer of the fountain, as seen in the left.
|
|
Add a thin dark line above each slab (this is the shadow of the slab).
Now, carefully erase the skeletal part of this layer.
|
|
Now at the top, draw the shape of the center of the fountain as seen in the sketch to the left.
|
|
Continue and draw a flat oval on top of the center shape.
|
|
Add two layers on top of this flat oval as seen on the left. Also, change the shape of the bottom part of the flat oval to be more square/ rigid.
|
|
Now, we will bring our attention back to the bottom layer of this fountain. I move around the fountain instead of only focusing on one part for a long time, as we should always be aware of the outline of the whole fountain. If we become too focused on one location, it can make different parts of the fountain look too different, and the whole fountain can begin to look wonky.
|
|
Outline the bottom part of the fountain as seen in the sketch to the left, and make sure your lines and angles look as realistic as possible.
|
|
Draw another dark line on top of the upper dark line you just drew.
|
|
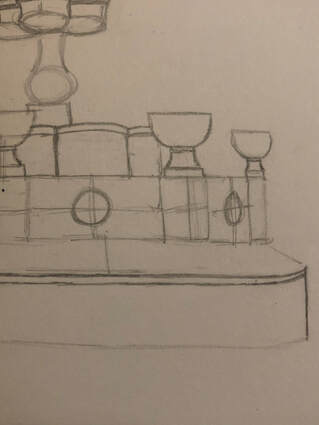
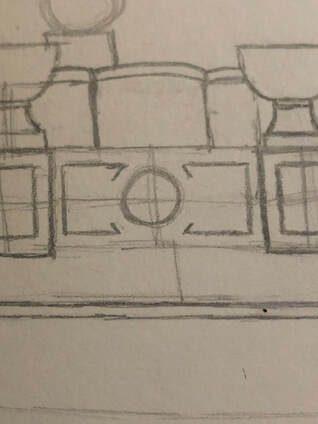
Working back up, we will bring our focus to the middle-ish layer (the one where there is a feint horizontal line going across the whole layer). Draw this feint line, as well as a feint vertical line in the boxes that don't have a vertical line.
|
|
Draw a circle like so in the middle box.
|
|
Draw a circle in the box to the right, but make sure this circle is squished and looking thin, as the perspective of this "box" is pointed to the right and isn't facing the camera, like the "box" in the middle.
|
|
Add another shape to this layer, drawing in a smaller square in the box in between the boxes with circles. This box will also be slightly squished, since that part of the fountain is slightly facing right. Make sure to use the feint "plus" in the middle of the box to help with angling, and make sure there's slightly more square in the left side of this plus than in the right (as seen in the photo).
Although not imaged, repeat this box drawing with the other "square box" on the left side of the image, although you do not have to consider the point of view for the left box like you did for the right. |
|
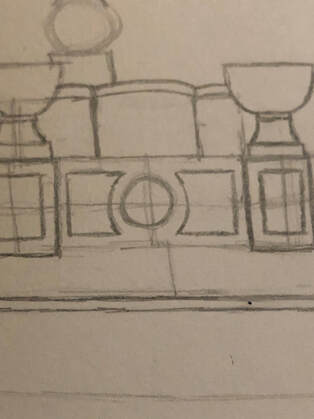
Going back to the middle circle box, draw some lines similar to those seen in the sketch to the left. Make sure these lines mirror each other accurately and looks accurate/ similar.
|
|
Draw in the curves as seen in the sketch.
|
|
Repeat these lines in the other two boxes with circles, accounting for the box on the left facing left, and the box on the right facing right. So for the box on the left, there is more "empty space" for the line drawn on the right than the left (as seen in the photo). This is difficult to explain, so pay more attention to the photo than the words in this step.
|
|
Repeat this step for the right box, and draw it similar to the sketch on the left.
|
|
Now add some detail below this layer, drawing a short line below each circle, with the left and right line angling out into the layer below this layer (as seen in the sketch to the left). Draw the thin, sideways "C's" below each circle, and account for perspective and direction. Again, this is a step where looking at the sketch is more important/ makes more sense than reading the directions.
|
|
Close the top part of these skinny, sideways "C's" as seen in the left.
|
|
Now, erase those feint lines that were just drawn.
|
|
Going back down, create the outline for the bottom part of the fountain, and draw in some soft dips as seen in the sketch to the left.
|
|
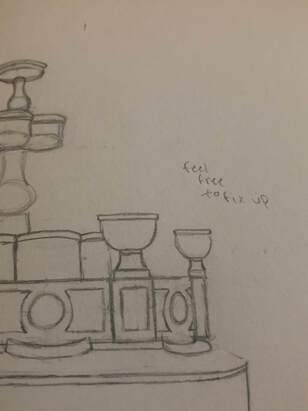
As always, throughout any drawing, feel free to go back and fix up any parts that look wonky or disproportional.
|
|
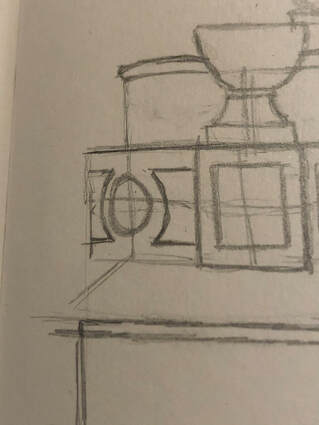
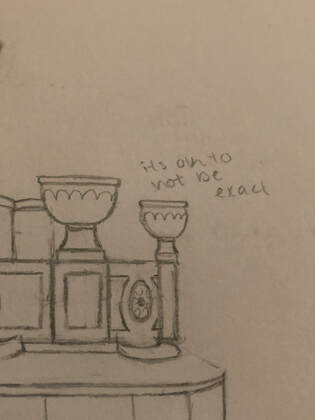
We will now move onto details, beginning with these "bowls". As the drawing says, its fine to not be exact since these details are quite small. Draw the curves as seen in the sketch to the left, and draw in the small detail in the circles as well.
|
|
Afterwards, I made the outline for the middle part of the fountain darker, since erasing and rubbing with my hand accidentally made it lighter.
|
|
Moving onto the plant part, begin to draw in the succulents that go in each bowl. The leaves don't have to be an exact outline of the original photo, but it should at least have a similar shape and amount of offsets (the "leaves" of the aloe).
|
|
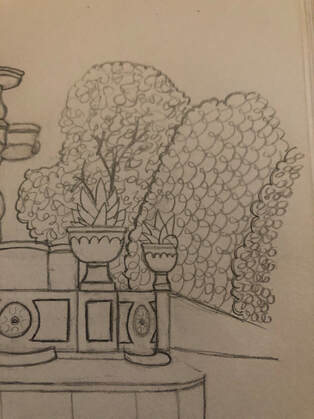
Next, draw the outline for the background trees, which appears to be about 3 trees. Also include the fence, which begins below the trees and ends around the bottom region of the middle layer of the fountain.
|
|
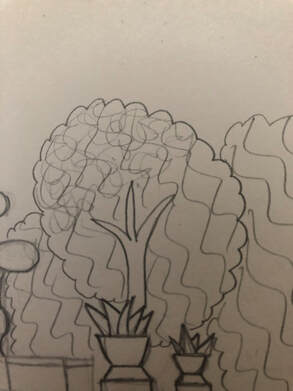
Next, add textures to the trees. I reccomend having two different textures for the trees, as it can help distinguish the three trees from each other. For help on how to draw these textures, check out the Drawing Techniques tab for tutorials on how to.
|
|
Next, add detail to the fountain, which includes the three vertical lines and a small bush around the bottom right.
|
|
Go back to the fountain and add some more details. This includes the cross-hatching pattern in the middle payer, the water that travels from the top of the fountain all the way to the bottom, and the flowers + grass towards the bottom.
|
|
Now we can move onto shading. For this drawing I used a straight line shading technique, and if you're not sure how to shade with this technique, feel free to check the Drawing Techniques tab. Shade around the bottom of the fountain, around the center of the fountain, on the right side of the potted plants, and on the right side of the trees. After this step, you are done with your drawing, but why not take it further with some coloring (if you want to).
|
|
Colors needed:
Light Green Medium Green Dark Green A Blue-Green Color Silver or Gray Sky Blue Brown tip: if you don't have a blue-green color, or a light or dark green, lightly mix green + blue to make the blue-green color, and lightly add white or black to regular green to make a light or dark green |
|
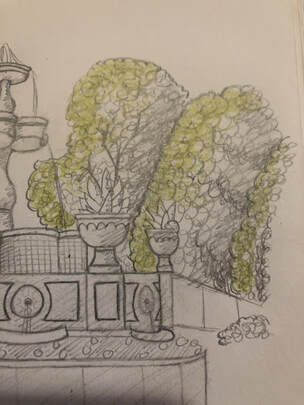
The three greens will be used on the tree's to emphasize the shading. Start off with the light green and draw it towards the left side of all three trees.
|
|
Continue coloring towards the right with normal green.
|
|
And then color in the already shaded areas with the dark green.
|
|
Everything else in the drawing just needs a simple color in, as seen in the drawing example. Color most of the fountain gray with the exception of the sky blue in the middle layer, the blue-green colored plants, the dark green flowers, and the dirt on the bottom. Don't forget about the background grass and bush, and you're now complete!
|
|
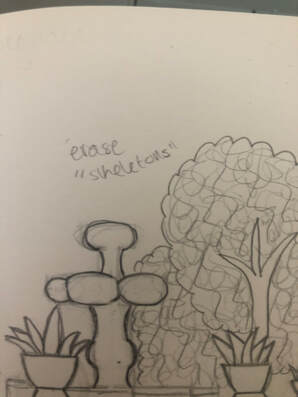
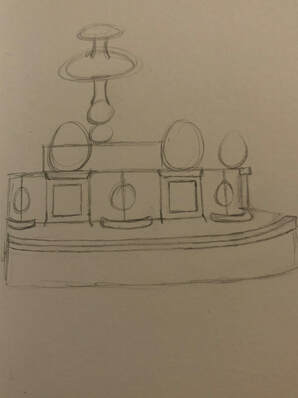
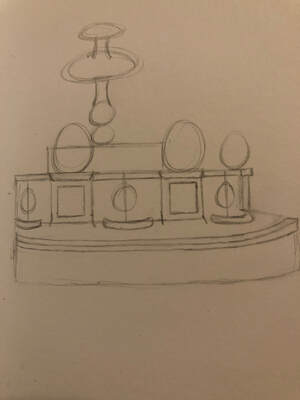
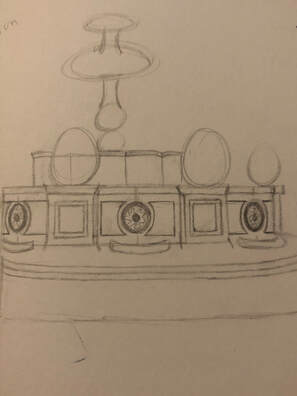
First, begin with drawing the "skeleton" of the entire fountain. You can use simple shapes such as ovals for the potted plants, and circles for the smaller pieces (as seen on the left). Keep in mind that the bottom half of the fountain will have a 3D appearance.
|
|
Next add a small amount of detail to the bottom layer, bu adding a foundation along the edge of the layer.
|
|
Keep in mind the 3D effect like I said before. As you can see, the top half of the line we just drew will look somewhat flatter/ skinnier than the bottom half, since that top half if on a flat surface.
|
|
Then, add more detail progressing up the fountain. Here, I began drawing the middle layer of the fountain, adding lines as shown.
|

|
Within the lines, proceed to draw smaller squares. Keep in mind that although this middle layer of the fountain is a repeating pattern, we will have to incorporate dimension and perspective. This means that the box on the left will have a different dimension and be drawn slightly differently than the box on the right. This can be seen in the drawing, as the space between the small boxes and the lines are not the same for the two boxes.
|
|
Now, we will focus on the part in between the boxes. Here, I split up each section in half to help with understanding dimension. Draw in a circle in the middle, and a shape similar to a bracket below the circle, basically below this layer of the fountain.
|
|
Next, close up the bracket by drawing a curved line, connecting the two points.
|
|
Then, add a small line on top, basically connecting the lines previously drawn a few steps back.
|
|
Here, I try to bring a 3D effect to the drawing. What I basically did was repeat the lines drawn around the box and I drew this line a bit to the left. Doing this, I created a 3D effect, making the whole "tile" pop out towards the left, making it more realistic.
|
|
Next, I drew another box within the box already drawn, keeping in mind that this whole tile is slightly facing left. Because the tile is slightly facing left, I left more space in between the two boxes on the left side than the right side, as seen in the photo. |
|
I repeated the same steps and ideas for the box on the right. Since this tile is facing right, I drew the lines for the 3D effect on the left side of the tile, and I made sure the smaller box had more space on its right side than the left.
****************** |
|
Next, I move onto the other part of this layer. To make sure the circles are a good circular shape, I split up the circle into four pieces as seen in the photo to the left. You can use different techniques to make sure your circles are truly circular, but this is my preferred methood.
|
|
After fixing the circles, I drew a straight faint line across this layer to make sure my circles were lines up. I reccomend using a ruler or another straight edge to do this part. Luckily my circles were already lined up, but if yours aren't, go back and erase and make sure those circles are aligned.
|
|
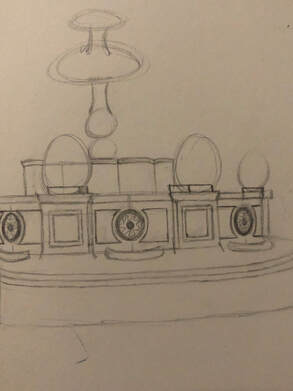
Now, I moved up a layer, and we will start off by adding a thin layer to the top of this layer. This layer also has a strong 3D effect, with each "box" area kind of coming out in a curved form. Drawing the layer on top will help with this curved form, as seen in the photos. Draw the top layer similar to what is seen on the left.
|
|
Now I decided to return to the layer below. I started off by drawing the vertical lines towards the edge, then drawing the horizontal lines close to where we previously drew those faint lines. Then, I drew the small flicks as seen in the photo, and I made sure that these flicks were all even/ equal to each other.
|
|
Then, I drew an even, curved line and connected these flicks. Drawing just the flicks and making sure they were even helps make everything else look more even.
|
|
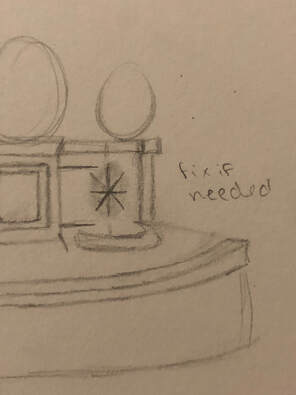
Here, I clearly wasn't satisfied on how I drew my circle, so I tried using a different technique of drawing an asterisk, and using perspective to try and make the asterisk face rightwards.
|
|
Here, I followed the same steps as before (lines, flick, connect). However, keep in mind the perspective of this area, as its facing right.
|
|
Lines, flick, and connect once again, but this time the perspective is leftwards. I also drew a line as seen to make sure everything looked straight and even.
******************** |

|
Next, I focused on adding detail to the little circles. Here, I just added some darkness/ shade.
|
|
Then, I added a small dark circle in the middle. Following that, I made squiggles all around the circle, as seen on the photo to the left. I did this for all three circles, keeping in mind the perspective of the left and right circes.
|
|
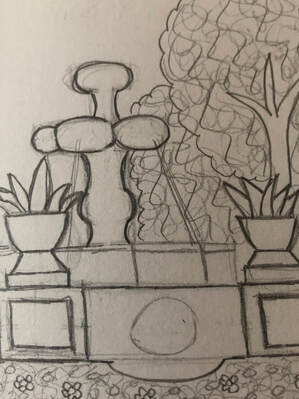
Now, in the bottom part of the ovals (aka the potted plants), I added some flat 3D squares. Since perspective comes into play, all three squares will look different (as seen in the photo to the left). The square furthest to the right will be smaller and flatter than the other two.
|
|
I added the next detail of the potted plants. To help keep things even, I drew more faint lines of where the base and the top of the "bowl" part of the potted plants. However, don't connect these lines to the smaller potted plant.
|
|
Add bowls as seen in the photo to the left.
|
|

|
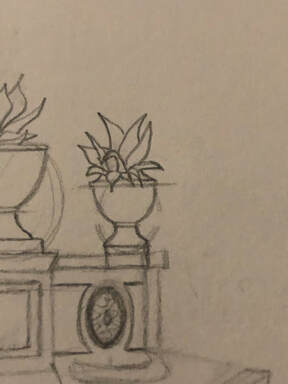
Now we will begin drawing the plants. These plants look similar to aloe vera's, but with slightly thicker leaves. I wouldn't worry on being exact on the leaves, as long as you get the basic shapes in.
|
|
The bottom part of the plant will have droopier leaves, while the top should have straighter leaves.
|
|
Repeat the previous two steps for the other two potted plants.
|
|
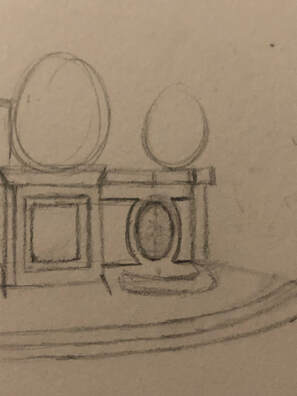
Now, we will focus on the top half/ smaller part of the fountain. Start off by drawing in the base, as seen in the photo (to the right of the leftmost potted plant).
|
|
Continue drawing upwards, using the skeleton you drew as reference.
|
|
Now, we will work on this tier of the fountain. Since the photo shows three smallish bowls, we will draw these three. Start off by drawing a flat bowl in the middle first, then draw two smaller ones on the side, as seen in the photo. I reccomend also drawing in the vertical lines seen in the left, as this will help with perspective.
|
|
Now we will add the detail to the bowls. The most important thing here is to make sure the size is drawn correctly, since its easy to mess up the sizes as its not connected to the "main part" of the fountain.
|
|
Repeat those details to the other two bowls.
|
|
Now, draw a vase-shaped shape in the middle of the middle bowl/ in the center of the vertical base you drew a few steps prior. Add the little circular shape as seen on the top of this "vase", keeping in mind the 3D effect.
|
|
Now, add a flat bowl, similar to the ones you just drew, and add a small layer on top of this flat bowl.
|
|
Now moving back down to the 3 bowls, add an oval to the middle of the lines I told you to draw to help with perspective, and draw another oval inside that oval. The real photo had lions instead of these ovals, but the lions are far too small to try and draw. For the other two ovals, remember perspective, and only draw in the shapes similar to the photo on the left.
|
|
Now that we've added the major details, we can go back and erase any skeletons still leftover. If you accidentally erase too much, you can always draw it back.
|
|
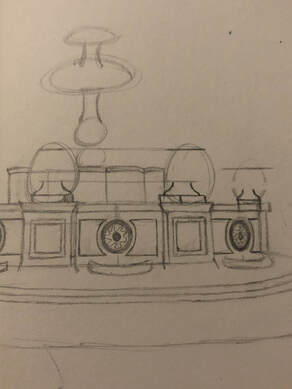
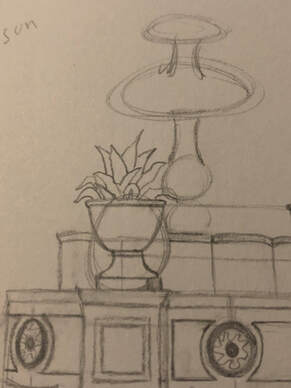
Now we will begin shading. In the top right corner, I drew the words sun, and this kind of helps me understand where the lighting is in the photo, and how the shadows would develop as a result. I started with the second to bottom layer, since it looked like the easiest layer to shade.
|
|
Before I continue shading, I added more detail to the layer above. As seen, I added small vertical and horizontal lines to the middle layer, and I added detail to the potted plants.
|

|
I continued shading, mostly focusing on the top part of the fountain.
|
|
I went back down and added shade to the pots and added more shade to the second to bottom layer, To help make the shading blend better, I used my finger. If you're not sure how to blend with your fingers, check out my video where I demonstrate how to do so underneath the Drawing Techniques tab.
|
|
Finally, I shaded in the bottom layer, kind of like a gradient (right being darkest left being lightest). Note how I also shaded in the bottom line of the top part of this layer (since it might be difficult to see).
|
|
The next few steps are continuing with adding details to the fountain. To recreate the flowers in this layer, I just made them small popcorn shaped flowers.
|
|
After adding enough flowers, I lightly shaded in the empty space between the flowers.
|
|
I added water to the top layer of the fountain, drawing soft lines as seen in the photo to the left. I also added small specks of water. I also forgot to add water to the bottom part of the fountain in this step, but I fixed it later on.
|
|
Since I previously forgot, I shaded in the plants, similar to how the plants are shaded in the real photo.
|
|
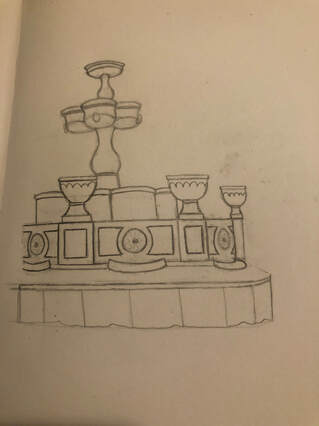
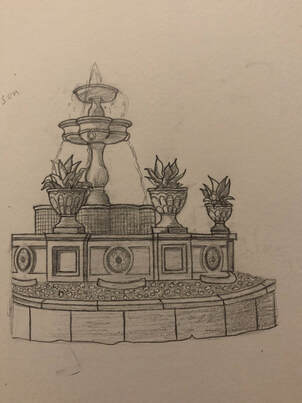
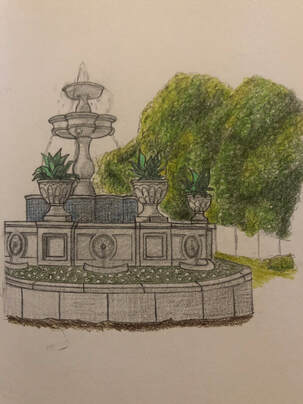
Finally, this is what the fountain should look like (minus the missing water in the second to bottom later). You can also erase the words "sun" if you haven't yet.
|
|
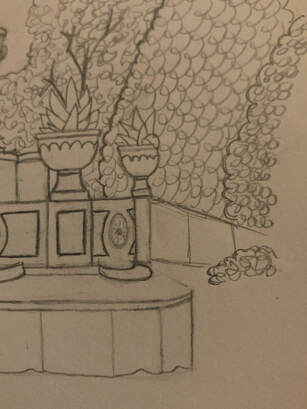
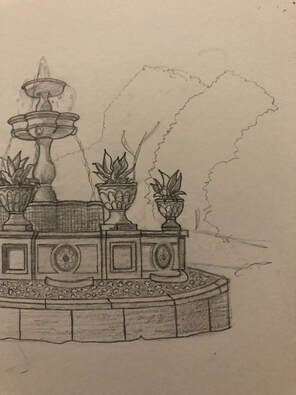
In the background, I was able to make out three large, leafy trees. Here, I gave them a soft outline.
|
|
Next, I added patterns to the trees.
|
|
You can make your own realistic patterns here, but if you need ideas on what kind of patterns to draw, I reccomend looking at some pattern videos on the Drawing Techniques tab. You will also draw in the shape of the fence, as well as the small bush next to the fence.
|
|
Now we will add shading to the trees. I added shade to wherever I saw darker spots on the tree. I used a technique of lightly drawing big circles to add shade. i would draw more circles if I wanted an area to be darker, and less circles if I wanted an area to be lighter. I also added vertical lines for the gate.
|
|
I finally noticed my error and drew in the water at the bottom of the fountain. You can stop your drawing after this step, or, you can continue drawing and add color (which is the best part in my opinion).
If you do add color, you will need: Light Blue Green-Blue Dark Green Medium Green Light Green Grey Brown Here, I applied the green-blue to the plants, the light blue to the middle layer, medium green to the flower layer, brown towards towards the bottom, and I colored in the whole fountain grey. |

|
Next, I added dark grew in the shaded parts of the tree, using a circular shading technique. If you'd like to know more about this technique, feel free to check out the Drawing Techniques tab, where I have a short video about this technique.
|
|
I used the same shading technique but with a medium green, mixing some parts with the dark green, but leaving the outer parts of the three trees still uncolored.
|
|
Finally, I added a light yellow-green color, using the same swirling technique.
|
|
Finally, I added medium green to the bush in the bottom right corner, and I used the light yellow-green in the grass around that area.
|
-
